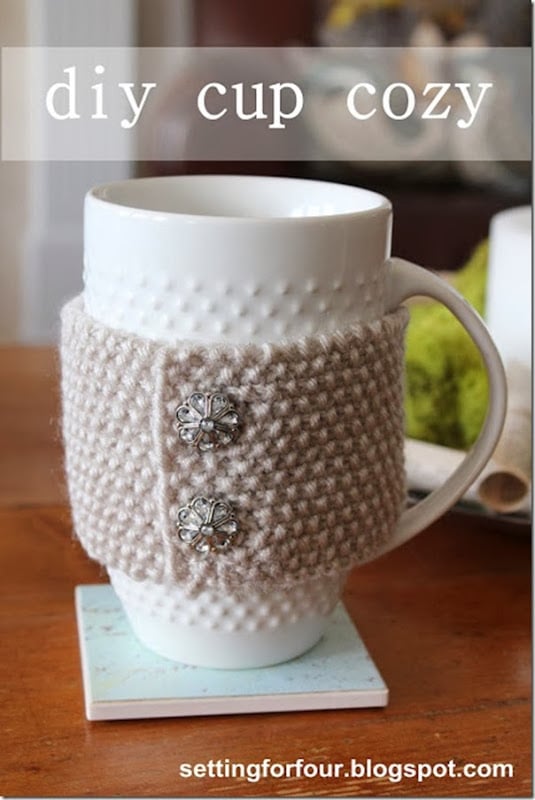
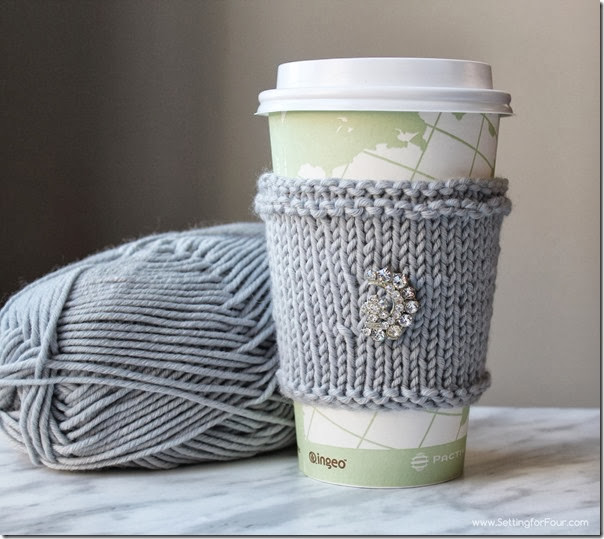
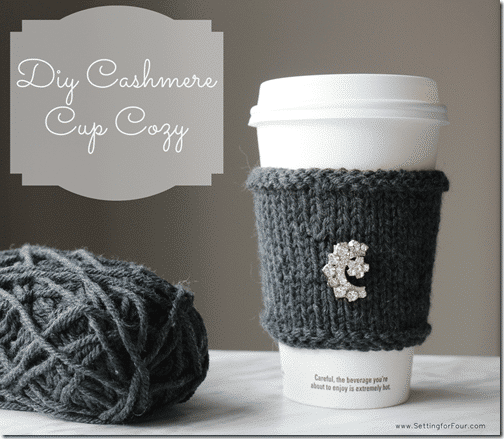
Learn how to make this EASY DIY Cup Cozy with vintage buttons for yourself or for a gift!
Knitting pattern and supply list included for this beautiful mug cozy.
This is such a fun and quick DIY craft to make!
This DIY Cup Cozy uses a knitting stitch called the ‘Seed Stitch’.
You can find many videos on the internet and Youtube for help to make this stitch.
I taught myself how to knit a number of years ago from reading a beginner’s knitting book.
Here are a few helpful learn to knit books below.
Supplies for DIY cup cozy
- This yarn in linen
- 2 Crystal buttons- like these
- Two Knitting needles size 4.5 mm (US Size 7)
- Embroidery needle
- Thread to match yarn color
Mug Cozy Tutorial Instructions
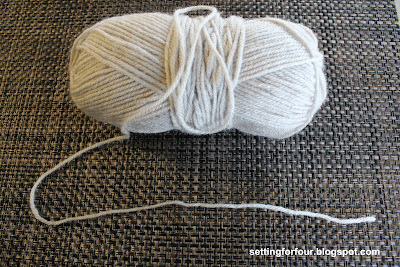
Here are a few pictures to show you how to start this project and how to knit.
1. Two Needle Cast On Method:
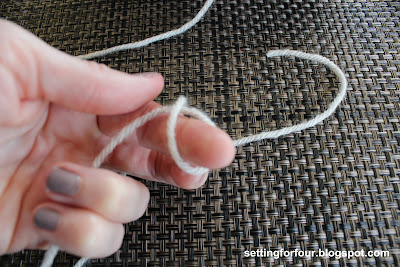
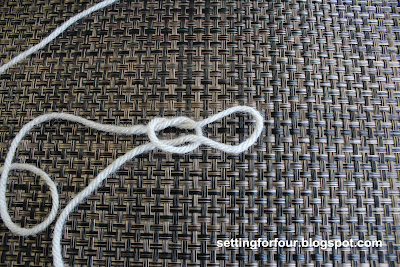
Take one end of the yarn about 12 inches from the end and form a pretzel shape like this.
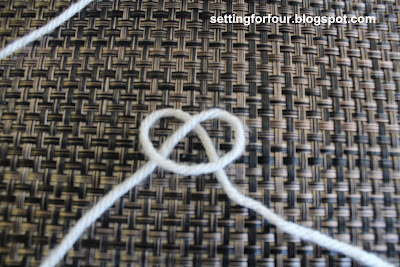
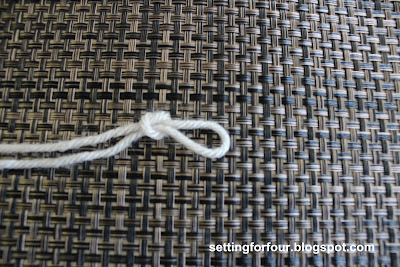
Pull the yarn through the pretzel shape to form a loop like this:
Keep pulling until there is a tight loop.
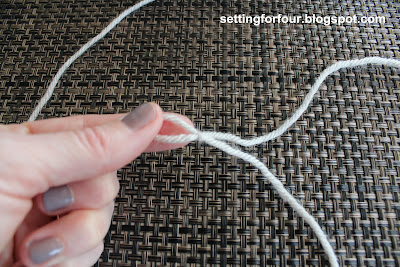
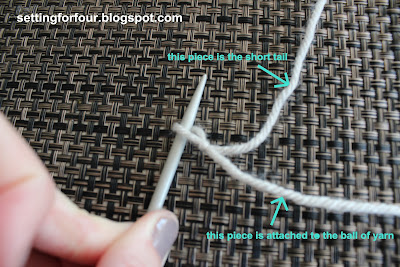
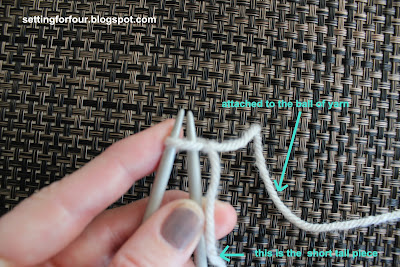
Take the end that is attached to the ball of yarn and pull to shorten the loop.
Place one Knitting Needle into the loop.Pull the loop so that it is snug onto the needle.
Take your other needle and place it into the loop as well like this:
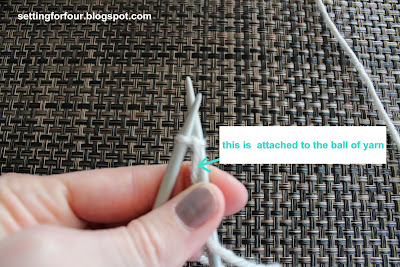
With the yarn that is attached to the ball, wrap the yarn around the needle on the right hand side like this:
Take the needle on the right hand side and use it to pull the wrapped yarn downward into a loop which you will place back on the left hand needle.
Continue until you have 14 stitches onto the needle.
This is called ‘Casting On’.
You have just ‘Cast On’ 14 stitches!
The reason I used 14 stitches is because 14 stitches produces a width that fits within the handle nicely.
If your mug handle is smaller or wider just decrease your stitches or increase your stitches to get the correct width.
2. Now begin the seed stitch:
This seed stitch is: one knit stitch followed by one purl stitch.
These two knitting stitches are continued like this: knit 1, purl 1, knit 1 purl 1 ect until you have completed all 14 stitches.
Continue knitting the seed stitch for each row until it is long enough for your mug.
To determine the right length, just place the knitted strip onto the mug and make it long enough so the ends meet.
Now keep knitting rows of seed stitch until you have added an extra half inch to the length of your cozy (to create the overlap part).
3. Buttonholes:
In the next row and still using the seed stitch, create two buttonholes for your buttons.
Knit the buttonholes so that they are evenly spaced across the row.
To make buttonholes:
a. Work to buttonhole location.
b. Bring yarn forward and slip the first stitch on the left needle purlwise.
c: Bring the yarn to the back of your work.
d. Slip the next stitch on the left needle purlwise onto the right needle.
e. Pass the second slipped stitch on the right needle over the first stitch (as if to bind off).
Repeat Steps d and e until the buttonhole is the right size.
f. Slip the last bound-off stitch onto the left needle.
g. Turn the work and use the Cable Cast-On method to cast on one more stitch than you bound off.
Insert the needle purlwise instead of knitwise between the stitches so that the top edge will better match the bottom edge of the buttonhole.
h. Turn the work.
i. Slip the first stitch on the left needle to the right needle and pass the extra cast-on stitch over the slipped stitch.
Work the remaining stitches on the needle.
4. Now knit three more rows of seed stitch.
5. Cast off all the stitches:
To complete your cozy you need to remove and fasten off the stitches from the needle.
This is called ‘Casting Off’.
6. Cut the yarn 6 inches from the end of your cozy to leave a tail.
7. Attach the 2 buttons.
With thread the same color as the yarn, sew on the buttons so they line up with the button holes.
8. Now all you have to do is weave in the beginning tail of yarn and the end tail of yarn with the embroidery needle.
9. You are done – give yourself a big pat yourself on the back!
I think I will make some more for my sisters and girlfriends!
I hope you liked my DIY Cup Cozy – Knit Mug Cozy Tutorial!
More Easy DIY Cup Cozy Tutorials:
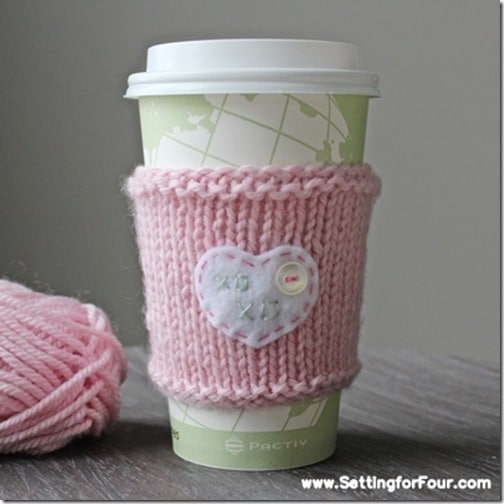
Knitted Mug Cozy with Embroidered Heart and xo message
DIY Extra Soft Mug Cozy with Vintage Broach
You may also like these DIY ideas:
- Floral Arrangement With DIY Easter Egg Filler
- 10 Minute Kitchen Decor Idea
- How to Paint Fireplace Tile- Easy Fireplace Paint Makeover
- How to Paint a Honey Oak Stained Wood Fireplace Mantel
- Easy DIY Peony Wreath For Summer – Under 30 Minutes
- How To Arrange Furniture In A Small Living Room
- Homemade Pina Colada Coconut Sugar Scrub
- Homemade Pina Colada Coconut Sugar Scrub
- DIY Rose Sugar Scrub- Relaxing & Reduces Stress!
- 26 DIY Sugar Scrubs to Hydrate Your Skin!
- Top 50 Bestselling Paint Colors At Sherwin Williams


 Heather is a Designer, True Color Expert® and proud military wife at
I am so happy to be following you back, but I can tell I’m going be jealous of how clever and crafty you are 😉
Stacy
Oh my goodness. I love it! I am so not a knitter. My mom has been trying to teach me but I am all thumbs. Your taste is flawless even when it comes to cup cozies. I am also excited because this might be my first ever sighting of you on your blog. I wouldn’t have taken you for a finger nail polish kind of a girl 🙂
Love, love, love it! Those buttons make it awesome!
–Katie
I am like Amy who commented above, all thumbs when it comes to knitting! My sainted Grandmother tried to teach me and I would drop stitches everywhere until even she gave up on me. I guess I will have to convince you to make these to sell and buy one, although I must compliment the tutorial you put together, the instructions were good and the pictures very clear and helpful! Thank you for sharing with us, I think it is absolutely beautiful and I want one!
This is one thing you will never see at my Abode… you are awesome.
There’s that adorable cozy that I love so much! My sister can knit, maybe I can talk her into making some. 🙂 I’m pinning and sharing on Facebook!
These are so fun, Heather! I’m a leftie and I think that has impaired my ability to pick up knitting despite my Mom and Grandma both being fantastic knitters. This is a cute project that would make a lovely gift. Just think, in a while you’ll be able to wrap your cozy around a REAL Tim Horton’s coffee 🙂
Claire
Love it !!
That is super cute! I love the look of it in knit as I have only seen it crocheted…nice work..This may have to get me back into knitting.. I”ve been on a crochet kick lately!
This is so cute!!
Wow this is BEAUTIFUL!! I wish I knew how to knit, because this is just too cute, and it would make for great Christmas presents, with a cute mug filled with some tea or hot chocolate mix! I pinned it so it reminds me to learn how to knit soon lol! Thanks for the inspiration!!!!!!
Wow, this cozy is gorgeous! You did a beautiful job!
Jo-Anna
So cute and and I love the buttons you used.
Love the Cozy! Too cute!
So cute! I need to work on my knitting/crocheting skills! I’d love for you to link this up to my party at Loving this {crazy} life!
I don’t know how to knit but every time I see something cute like this it makes me want to learn! Thanks for linking up your projects at The Winthrop Chronicles!
That’s very pretty! I love the muted, classy colors. Cute!
Oh this is right up my alley!! I love mugs and anything that is cozy! 🙂
What a great tutorial! Love it! Thanks for linking up to Financial Friday last week.. I shared this on my facebook page! Be sure to grab a button tomorrow 🙂
This is lovely!
I love this idea so much! Thanks for the tute!!
Thank You for sharing the tutorial
Love this!!!
We need a girls long weekend! So we can blab blab about blogging and you can show me how to knit. I have the needles, ball of yarn and a book. I did it for a while and had not clue how to finish a project and make it look nice. You know we Floridians need a lot of sweaters here. LOL Just something on my bucket list. Learning to Knit!!
This is just lovely, I’ve gotten back into crocheting (I learned as a little girl), because it’s less stress on arthritic hands. I can’t wait to try this. Thank you for sharing.
Check you out!!I just saw you featured over at Tip Junkie! Congrats girl! This project was darling- so it’s well deserved!!
xo Becca
So cute!
I am a big knitter, and was attracted to how cute you DIY Cup cozy is. So very pretty. Lately I’ve been knitting smaller projects, so this fits right up my alley for now. Thanks for the great tutorial and links.
Thanks for this tutorial! I can sew, but knitting has always been so confusing to me! My daughter has been learning from a friend, so I think we’ll try to tackle a few of these together. Thanks for linking up!
This is just too cute not to share! So very pretty.
Very pretty cozy.
So pretty! I wish I could knit! Thanks so much for entering One Crafty Contest; good luck!
Gorgeous! XOXO
Heather, I just seen this post on pinterest last week, got right on to target, ordered the latte mugs and ran to michaels to get the yarn and buttons. Mugs came yesterday and just made one today. The linen on white milkglass is just stunning. Thank you, hope to see more of your ideas
How did I not know that you’re a knitter? I love cup cozies but have still never made any … I’m pinning this tutorial!
Thanks Randi!!! I love cup cozies!
Thanks for the tutorial, it looks great!
However, I did run into a problem that I didn’t detect until nearly finished, and that is that the instructions for seed stitch for a beginner are not very clear. It states knit 1 purl 1, continue until the end and repeat. That is precisely what I did and thus have ended up with a 1×1 rib stitch.
May I suggest some clarification around seed stitch? That is, knit 1 purl 1, continue until the end, and then do the opposite on the next row (purl 1 knit 1)?
It’s still turning out lovely, though!
What beautiful projects–especially the cup cozy. It created the perfect contrast to use buttons with a little sparkle.
Thanks Jennifer!
This comment has been removed by a blog administrator.
Love this cozy. Maybe I’m missing something, but seems the second row of the seed stitch is missing. The way I’m reading it, it would create a rib stitch. After you complete the first row of 14 stitches, you would do the opposite and begin with P1, K1, etc, Then repeat those two rows alternately. However, if you had an odd amount of stitches castes on, then K1, P1, etc every row would create the seed stitch. The vintage buttons are awesome and really give it an elegant look! ?
Hi, do you have tutorial for making button holes?
Hi Mini – I just updated the instructions to include buttonholes! Hope that helps! Best – Heather
Hi, great post but can you tell me how much yarn it requires (roughly).
Thank you
Less than one ball. I didn’t measure the amount exactly. Hope that helps!
On #6, it SHOULD say FROM, not form.
Thank you so much Belinda for your keen eye! Fixed the typo! Have a beautiful day!
Heather,
can you send me the pattern for this? for some reason I dont see anything past part of the cast on tutorial.
Thank you!
Hi Cindy – I fixed it. The whole tutorial is there now!
Hi Heather! No idea if you will see this, but I love this cup cozy and have knit it up to button hole stage. I am a bit confused by steps past “g”- do you think yarn over button hole method would work?
Thanks for any help you may provide!