Setting For Four Interiors

  • Online Interior Design Services
  • Interior Design Tips ↓
    • Christmas Decor Ideas
    • The Holiday Shop – Festive Christmas Decor
  • Paint Color Tips
  • Shop My LIKEtoKNOW.it
  • My Amazon Shop
  • Decor & Home Sales
  • About ↓
    • Welcome To Setting For Four Interiors
    • Collaborate
    • Privacy, Disclosure & Photo Usage Policy
  • Contact

DIY Pallet Bar – Instructions to Make!

by heather 25 Comments

238 shares
  • 1

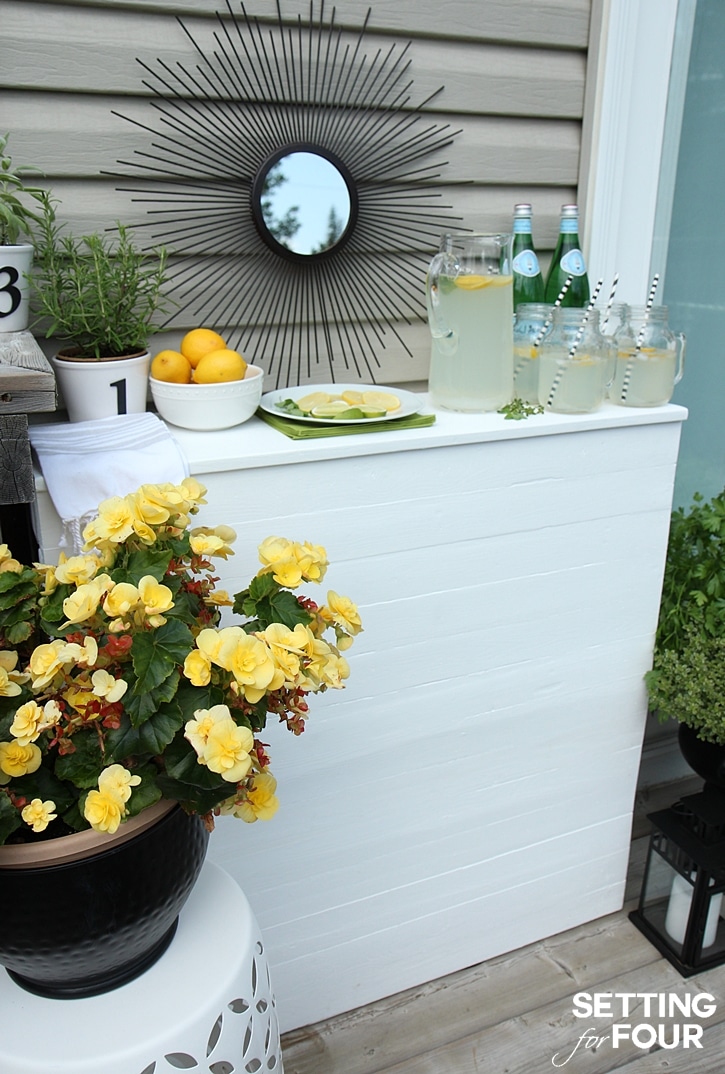
 We love spending as much time as we can outside on our deck and patio. Especially now that we have this DIY Pallet Bar to enjoy!

We try to soak up as much outdoor lounging and entertaining as we can. Our deck has been missing one thing though….a bar for relaxed outdoor entertaining!

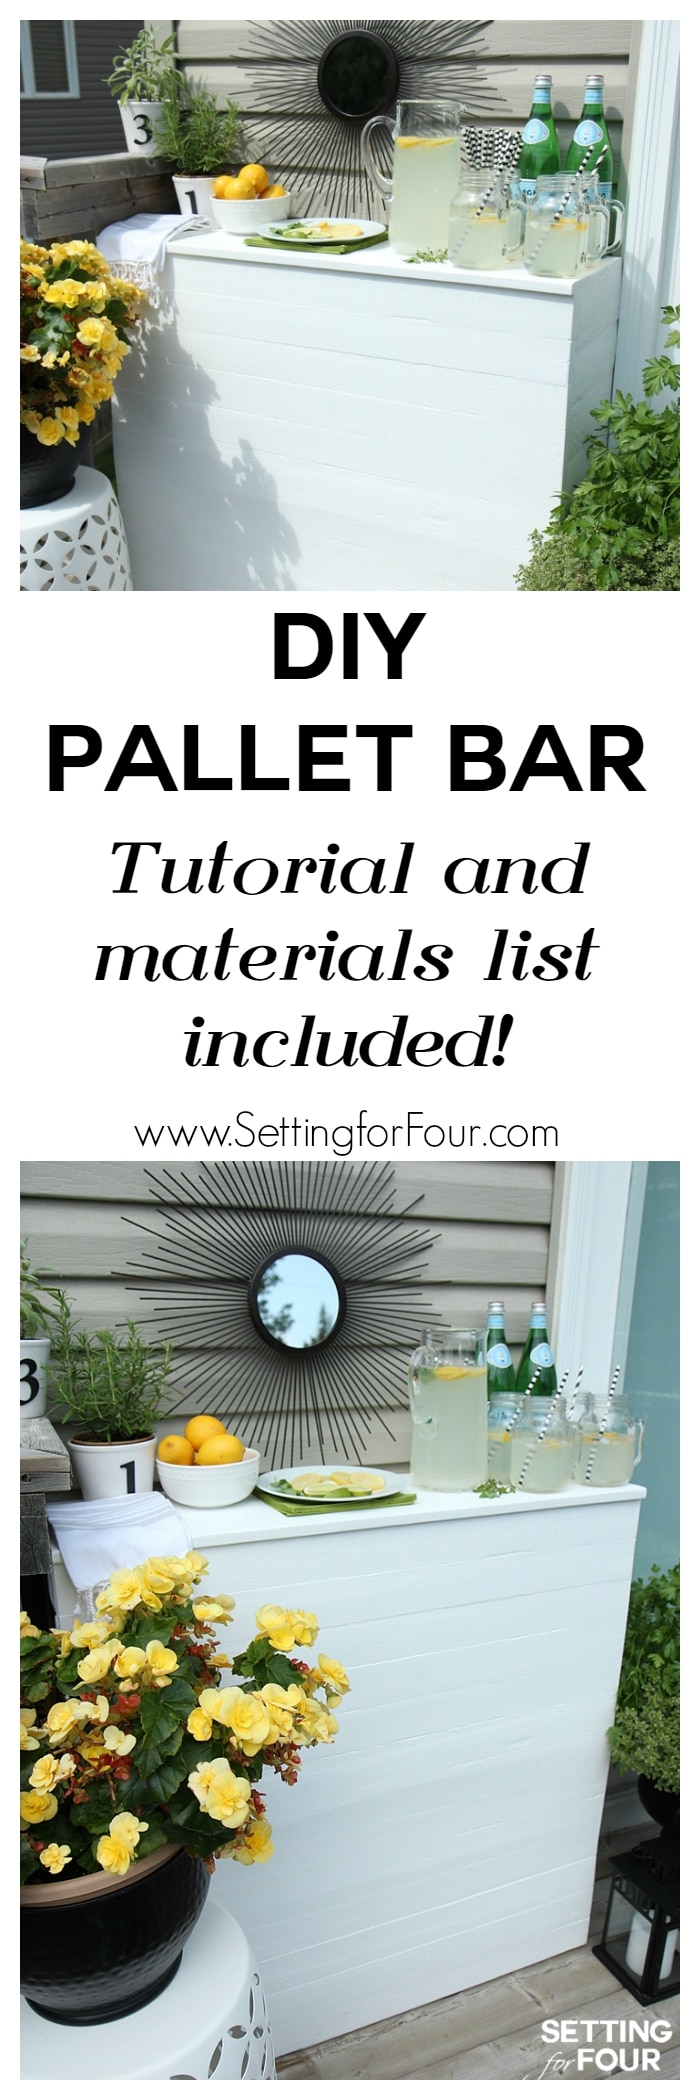
Recently we amped up the fun factor by adding this beautiful planked DIY Pallet Bar to our deck. We absolutely love it and today I’m sharing the instructions on how you can make one too!

Love to entertain? Make this DIY Pallet Bar for your deck, patio or man cave! Made with pallet wood in a planked style. Material list & tutorial included! www.settingforfour.com

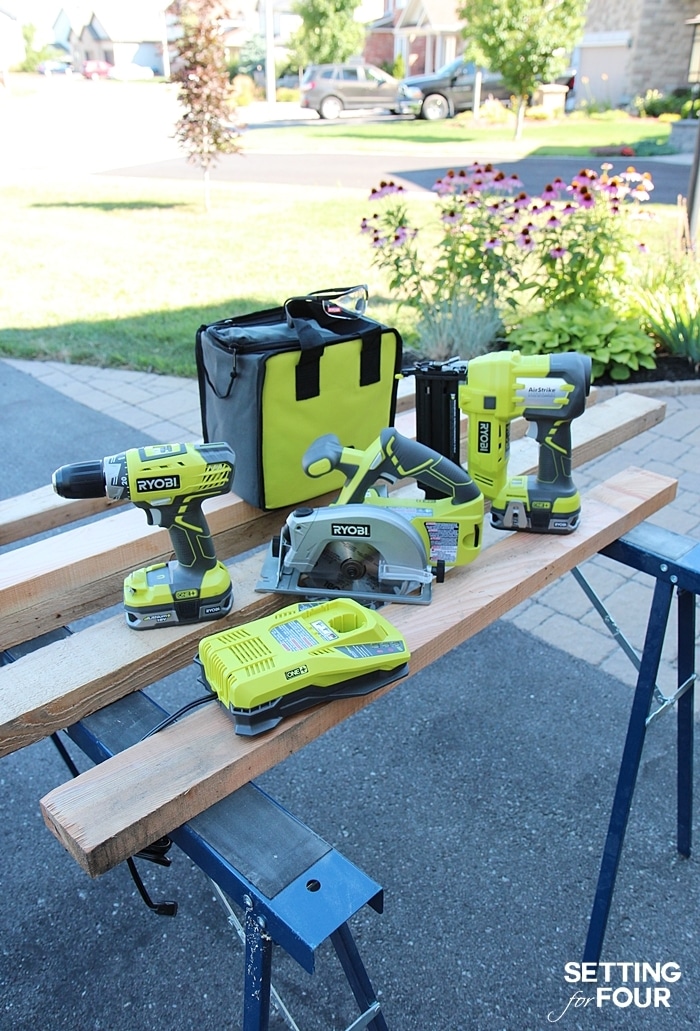
I used these amazing RYOBI 18V One+ system tools to build our pallet bar.  The fabulous team over at Ryobi sent me these awesome tools – all opinions and expressions are my own.

This tool system comes with a new and improved Lithium plus battery!! So amazing!!

Ryobi power tools. www.settingforfour.com

We designed our DIY pallet bar not only as an area to serve drinks and food but also to hide a lot of spare electrical outlets that we have sticking out in this area of our deck….which we wanted to cover. This is also the reason we ‘planked’ our bar…to hide all of that stuff!

This post contains some affiliate links for your convenience. Click here to read my full disclosure policy.

Here’s how we made it:

Materials list for DIY Pallet Bar:

2 x 36″ long pallet wood

4 x 32.5″ long pallet wood

4 x 6.5″ long pallet wood

10 x 9.5″ long pallet wood

13 x 36.5″ long pallet wood

2 x 36.5″ long pallet wood

3″ #8 screws

spring clamps

80 grit sandpaper

measuring tape

carpenter’s pencil

straight edge ruler

11/32 drill bit

Cordless power drill

Circular saw

Nailer

Lithium Battery

Battery Charger

White exterior latex paint (you could use interior latex paint if you are using it indoors or stain it too!)

paint brush

Safety glasses

Hearing protection

Directions:

 Use safety glasses and hearing protection during all steps!

First remove pallet wood from pallets, using pieces that aren’t heavily cracked or splintered.

Measure all pallet wood pieces using measuring tape and mark correct sizes using carpenter’s pencil and straight edge ruler.

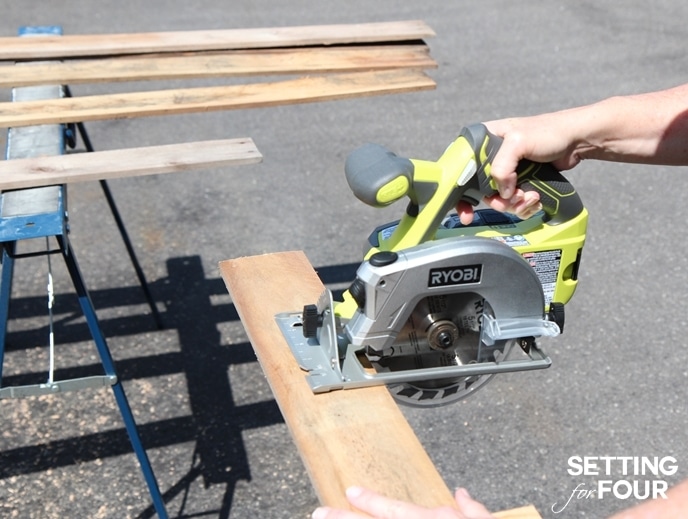
Cut all pallet wood pieces to length on the cut list using circular saw.

Making a DIY Outdoor Wood Bar. www.settingforfour.com

Create inner base frame with top and legs:

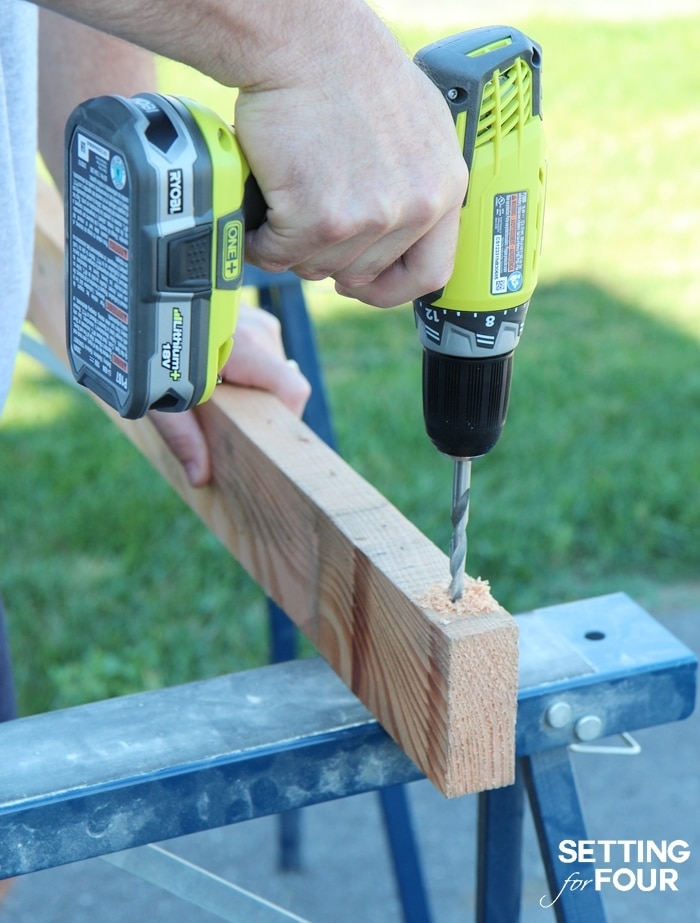
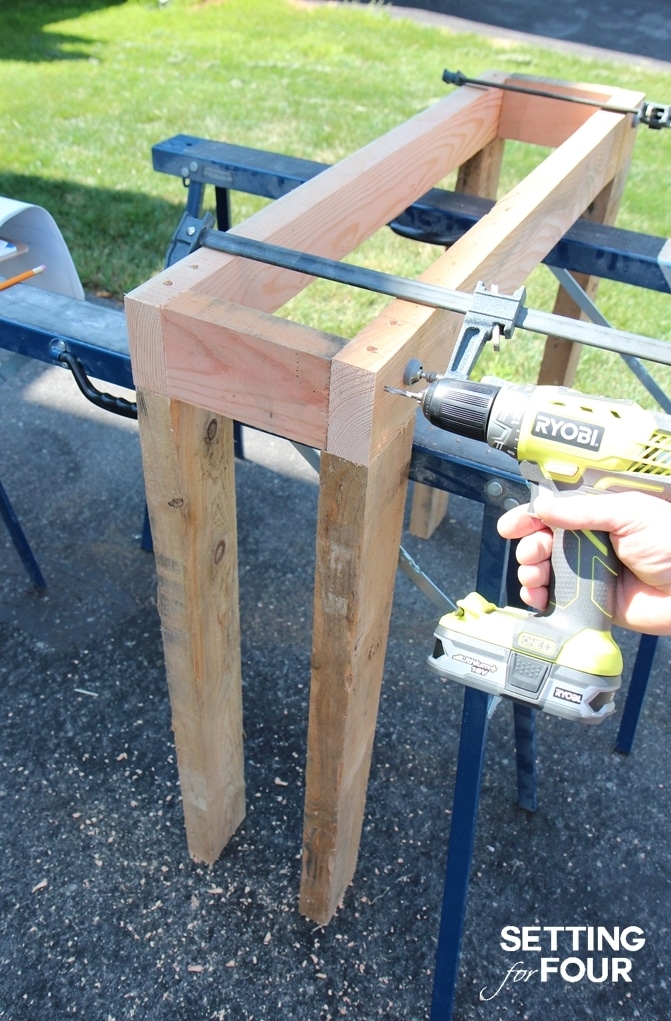
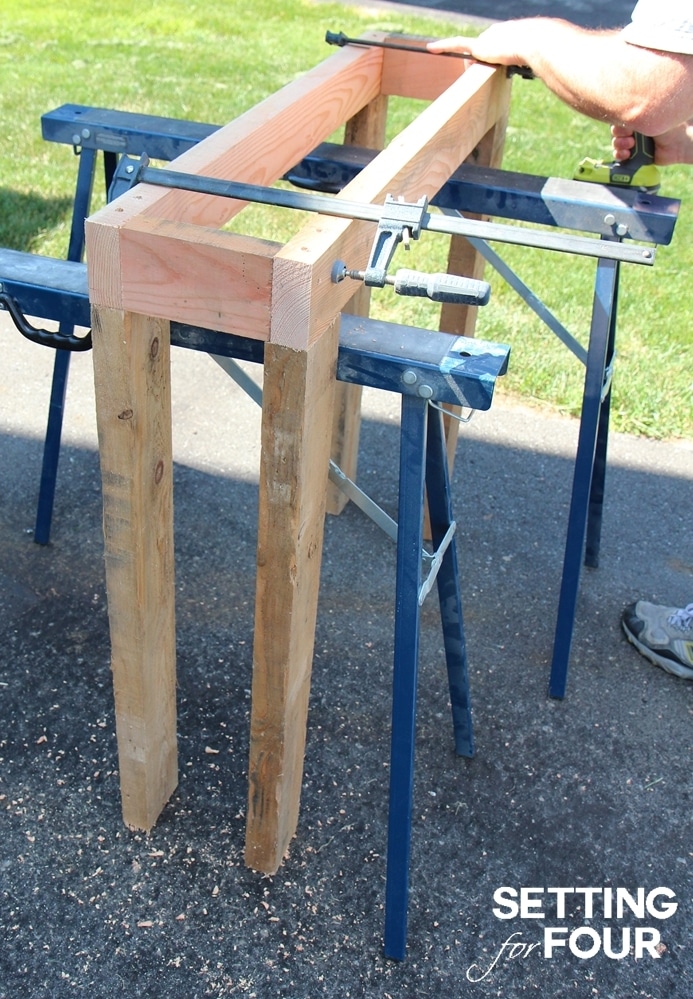
Create inner base frame top by attaching 2 x 36″ pallet wood pieces to 2 x 6.5″ pallet wood pieces. On each of the 4 ends, place 1 screw 1 1/4 inch from edge and 1 screw 3″ from edge using the 
Ryobi One+ 18-Volt Lithium-Ion Starter Drill Kit
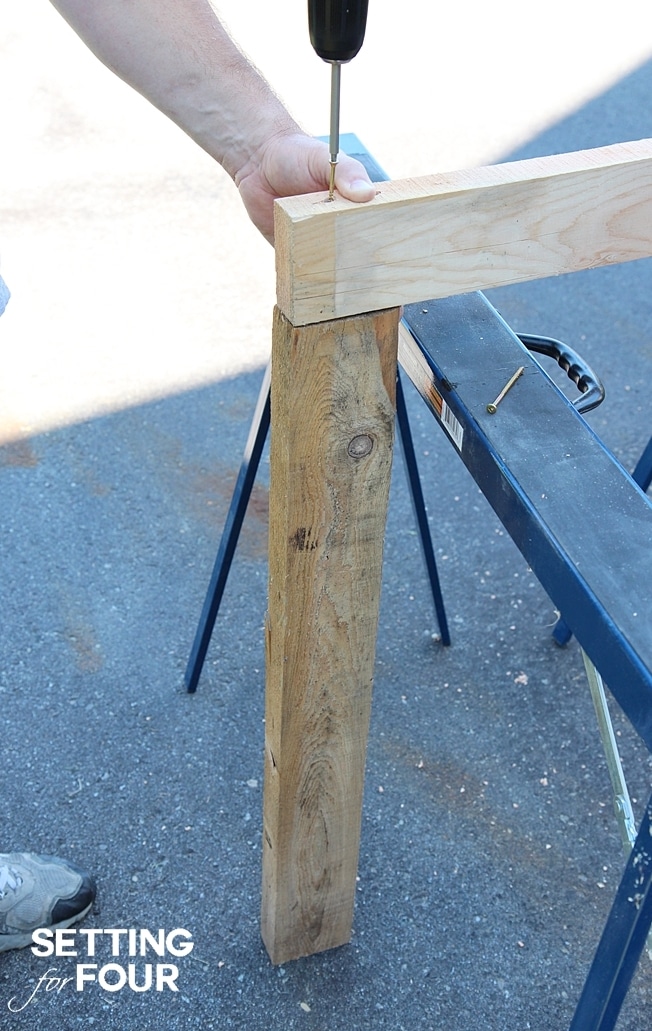
..Before you add the screws first create pilot holes for the screws using the 11/32 drill bit.

Clamp pieces together.

Ryobi One+ 18-Volt Lithium-Ion Starter Drill Kit

Buiding a DIY Outdoor Pallet Wood Bar. www.settingforfour.com

Tutorial to build a DIY Outdoor Pallet Wood Bar. www.settingforfour.com

Instructions to build a DIY Pallet Wood Bar. www.settingforfour.com
How to build a DIY Pallet Wood Bar. www.settingforfour.com

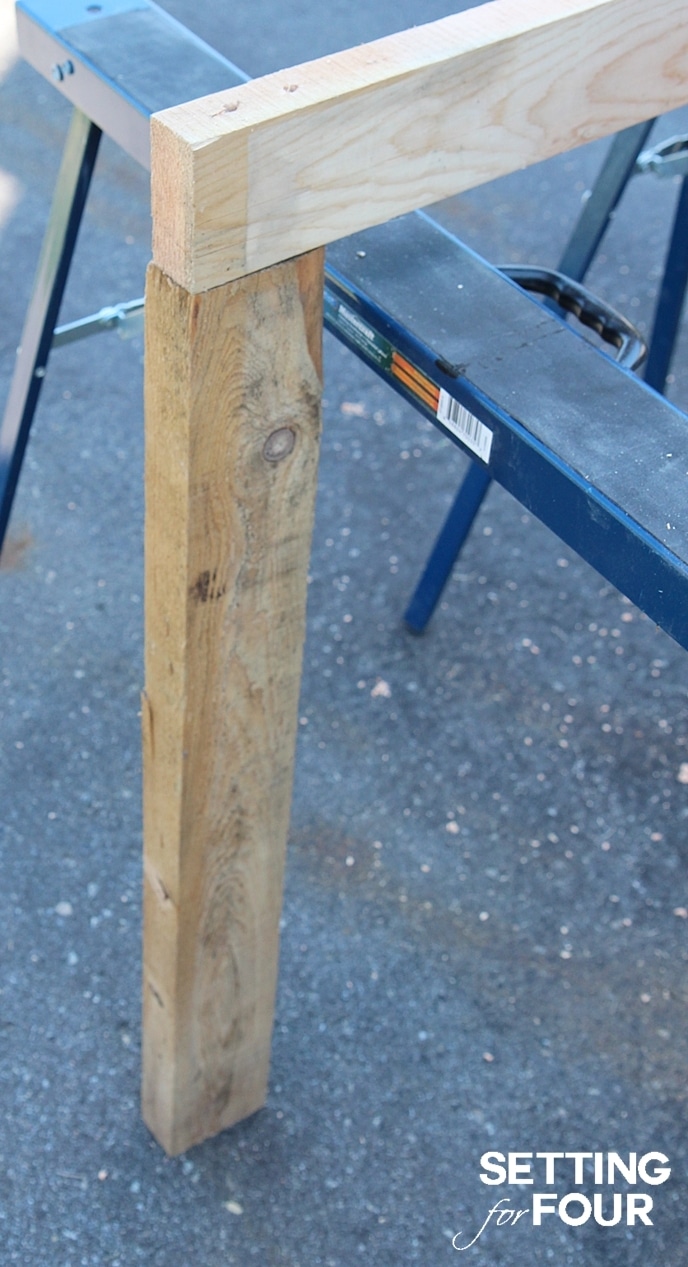
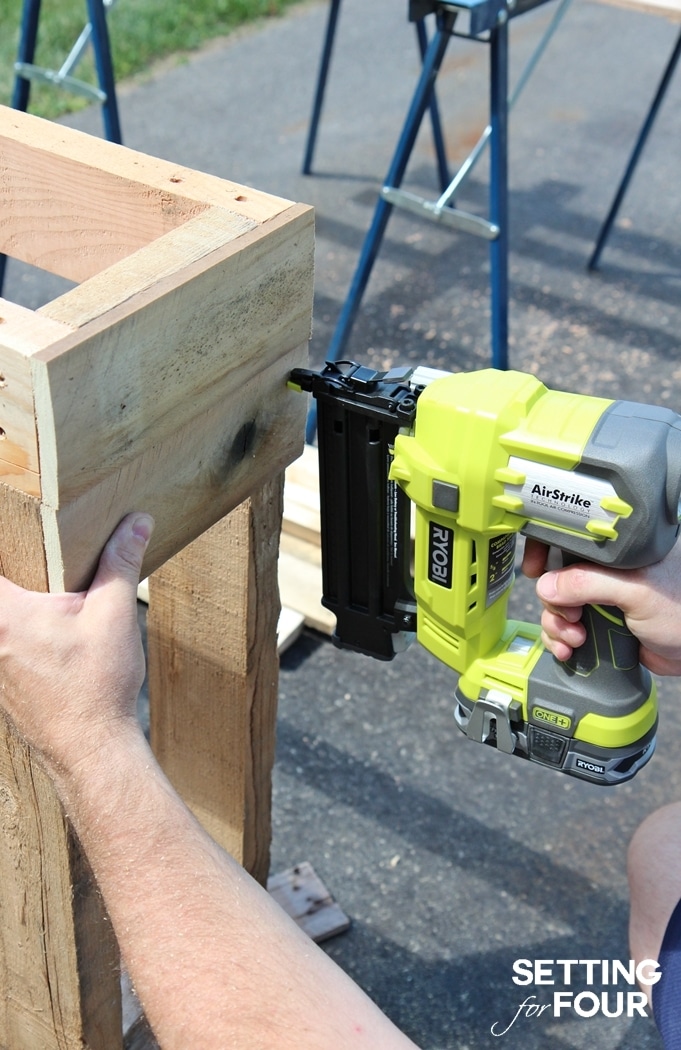
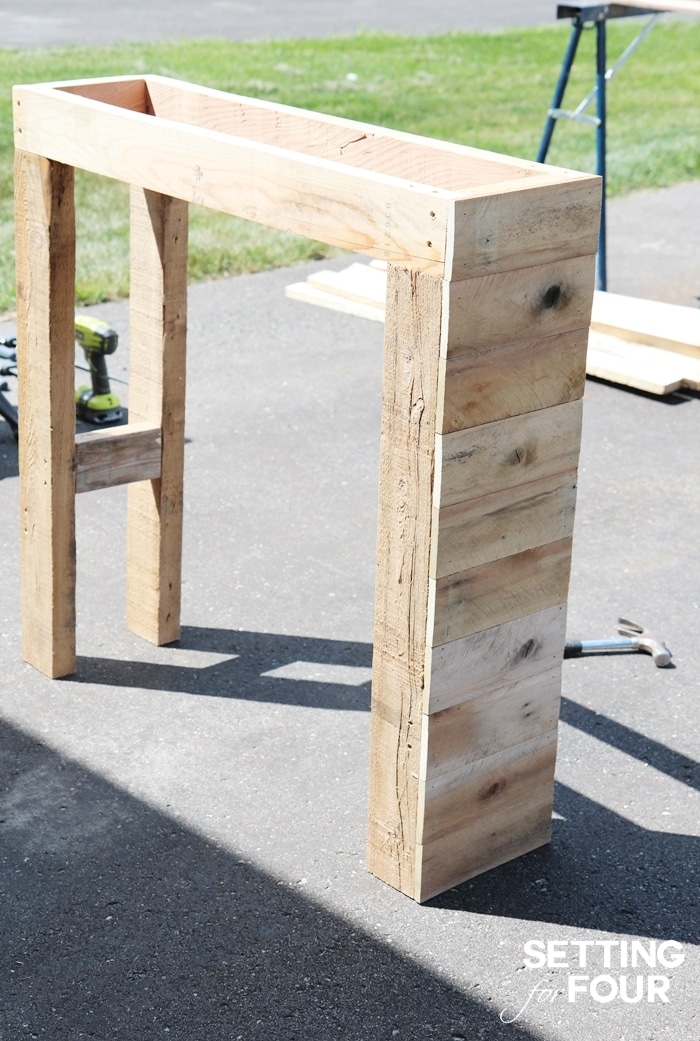
Attach 4 legs: Using 4 x 32.5″ pallet wood pieces and the drill, attach each of the 4 legs to the top in this way: on each leg use 2 screws that are 1 3/4″ from top and 2 screws that are 3″ from top.

How to make a DIY Wood Bar. www.settingforfour.com

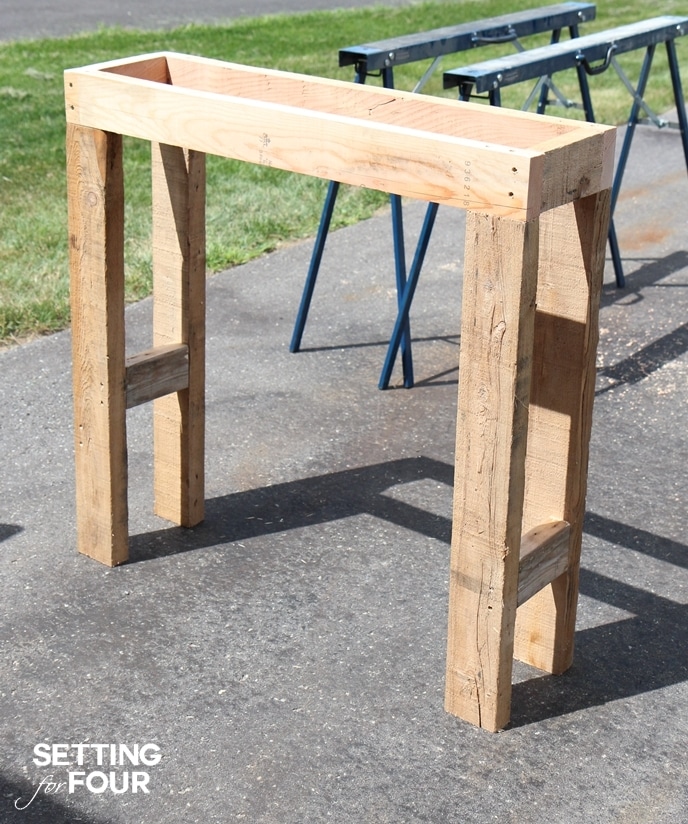
Attach 2 x 6.5″ pallet wood pieces on sides near bottom for support.

How to make a DIY Wood Bar for your deck, patio or man cave!. www.settingforfour.com

For sides:

Cut 10 pieces of pallet wood 9.5″ long.

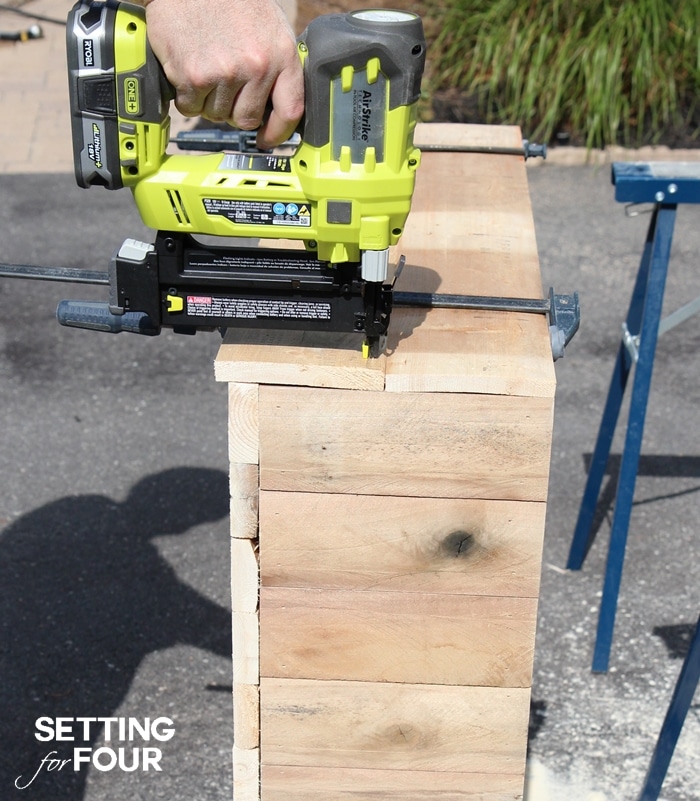
Attach with brad nailer.

Butt boards up against each other with no spacing in between in a ‘planked’ style.

How to make an awesome DIY Wood Pallet Bar for your deck, patio or man cave! www.settingforfour.com

Awesome DIY Wood Pallet Bar idea for your deck, patio or man cave! www.settingforfour.com

For front:

Cut 13 pieces of pallet wood 36.5″ long.

Attach to front of bar frame with brad nailer

Butt ends of wood up to each other with no spacing in between in a ‘planked’ style.

For top:

Attach 2 pieces of pallet wood 36.5″ long x 5.5″ wide to bar top with brad nailer.

Use 11/32 drill bit for countersinking all screws.

Sand front using 80 grit sandpaper.

Rustic DIY Wood Pallet Bar idea for your deck, patio or man cave! www.settingforfour.com

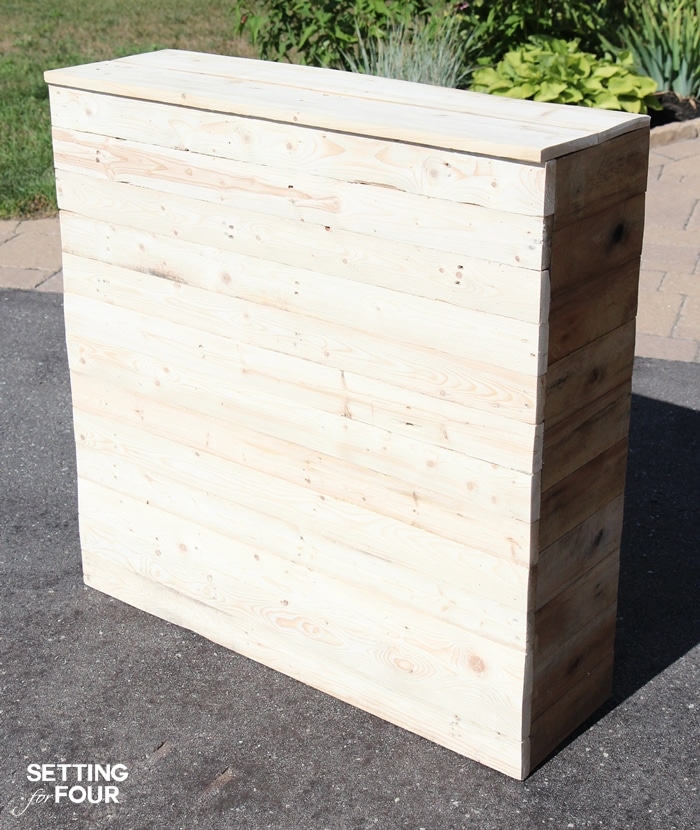
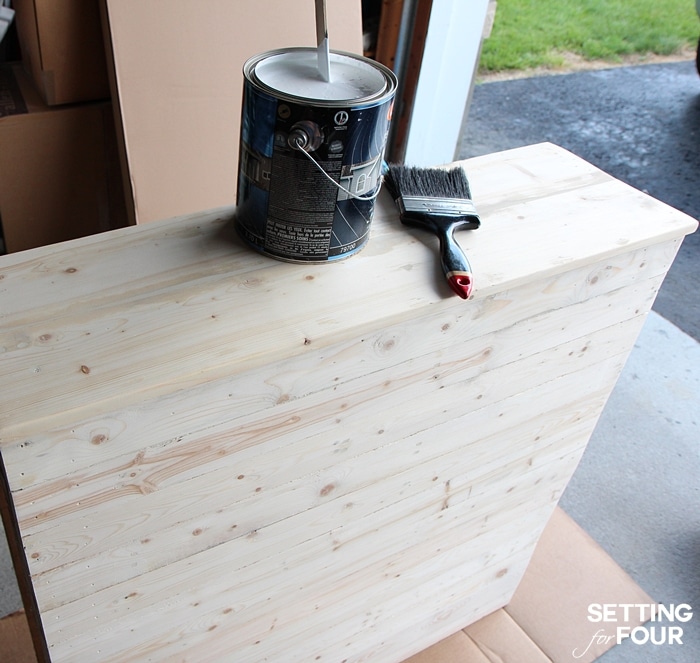
Here it is all planked!

DIY Wood Pallet Bar instructions - for your deck, patio or man cave! www.settingforfour.com

 Then we gave it two coats of white paint.

DIY Wood Pallet Bar instructions - for your deck, patio or man cave! www.settingforfour.com

We have really been enjoying our beautiful outdoor DIY pallet bar! It’s the perfect spot to serve drinks and snacks on our deck!

Do you have a bar in your home or on your deck?Love to entertain? Make this DIY Pallet Bar for your deck, patio or man cave! Made with pallet wood in a planked style. Material list & tutorial included! www.settingforfour.com

  You may also enjoy these Outdoor Design Ideas:

  • Beautiful Patio Makeover Ideas with Walmart!
  • DIY faux boxwood planters with twinkle lights
  • Target Outdoor Living Ideas
  • Easy DIY Outdoor Curtain Rods In 10 Minutes
  • How to Make Your Small Outdoor Space Look Bigger
  • DIY Outdoor Restoration Hardware Inspired Farmhouse Table 
  • How to Make an Adirondack Chair
  • Summer Deck Decor Ideas for Outdoor Living
  • The Easiest Way To Divide Hostas & Transplanting Tips
  • 6 Small Space Landscaping Plants
  • No Fail Plants for Landscape Gardens & Flower Containers
  • 12 Stylish Porch, Deck and Patio Decor Ideas
  • DIY White Washed Terra Cotta Pots
  • Easy DIY Herb Pots with Numbers
 

GET THE FREE BEGINNER'S GUIDE TO INTERIOR DESIGN & DECORATING!

Design secrets to create spaces you'll love!
By signing up, you agree to receive Setting for Four e-mails. Please see our privacy policy for more information. Although I'd hate to see you go, you may unsubscribe at any time. Your information will never be shared or sold to a 3rd party.
238 shares
  • 1

Filed Under: Decor, DIY, Entertaining Tips, Furniture, Tutorials Tagged With: bar, deck, Decor, DIY, entertaining, furniture, pallet, tutorial, wood

heatherHeather is a Designer, True Color Expert® and proud military wife at Setting For Four Interiors. Heather offers online Interior Design and Paint Color Services. See all of our design tips & tricks on the blog and follow us on Instagram for more design and decor inspiration!

Comments

  1. Hope Williams says

    September 15, 2015 at 7:26 am

    What a fantastic tutorial! And it looks FAB!!! too! It makes such a versatile piece for just about anything as well as a bar.
    And that tool giveaway, Awesome! We have been through 2 drill sets in 1 year. I so NEED this set! Great giveaway ladies!
    Blessings, Hope

    Reply
    • heather says

      September 15, 2015 at 3:36 pm

      Thanks for entering Hope and good luck with the giveaway!! I’m so glad you like our tutorial and yes – it’s super versatile!

      Reply
  2. Judy Beauchamp says

    September 15, 2015 at 8:35 am

    I would love to make this bar! We have a fifth wheel at a vets camp, and are in the process of creating a “pub Shed” – this pallet bar would be the perfect thing to have in front of the shed when entertaining.

    Reply
    • heather says

      September 15, 2015 at 3:36 pm

      Great idea Judy – I love it!! I think you should make it for your front shed area!! Send me a pic when you make it, I’d love to see it! 🙂

      Reply
  3. Jen @ RamblingRenovators says

    September 15, 2015 at 9:30 am

    That pallet bar looks so perfect out on your deck! Love the planking, it adds a nice texture. Great tutorial. I happen to have a pallet out in the garage so now you have me thinking 😉

    Reply
    • heather says

      September 15, 2015 at 3:34 pm

      Thank you Jen for your sweet compliments – our new bar really adds a lovely ambiance to our deck! 🙂

      Reply
  4. ellen ross says

    September 15, 2015 at 10:40 am

    a coffee table for our basement!

    Reply
  5. Kaitlyn S says

    September 15, 2015 at 11:17 am

    Great post, might have to build one of these for our deck! If I won the Ryobi One+ tools I would revamp our outdated sunroom! New drywall cieling, hooks and a chest for better storage! Awesome giveaway!

    Reply
    • heather says

      September 15, 2015 at 3:33 pm

      Thank you Kaitlyn for your sweet compliments and for entering!! Revamping your sunroom sounds like a great idea!! 🙂

      Reply
  6. Virginia Fynes says

    September 15, 2015 at 12:28 pm

    What a great little project, and fits so perfectly! Awesome tutorial

    Reply
    • heather says

      September 15, 2015 at 3:33 pm

      Thanks Virginia – we’re trying to use our bar as much as we can while the weather stays nice! 🙂

      Reply
  7. Shauna says

    September 15, 2015 at 2:27 pm

    What a great little addition to your deck! I created an outdoor bar cart earlier this spring and it’s so handy. Too bad I couldn’t come over for a cocktail. Someday perhaps!

    Reply
    • heather says

      September 15, 2015 at 3:32 pm

      Thanks Shauna – wish you could come over too!!! That would be fun 🙂

      Reply
  8. Pamela says

    September 15, 2015 at 10:52 pm

    Love the outdoor bar. Will definitely be making one of these. I really like the white but might try a bright pop of color on mine. Thanks for the directions!

    Reply
    • heather says

      September 16, 2015 at 5:24 pm

      You’re welcome Pamela!! Have fun making one for your home – a pop of color would be beautiful!! 🙂

      Reply
  9. Heather @ new house new home says

    September 16, 2015 at 5:43 am

    I’ve been lusting after this tool set since BlogPodium last year! What an awesome giveaway.

    And I love how you took plain old pallet wood and turned it into something awesome and useful.

    Reply
    • heather says

      September 16, 2015 at 5:23 pm

      Thanks for entering Heather and good luck!! I love projects like this too – that make your space more functional…and more pretty too! 🙂

      Reply
  10. Vic says

    September 18, 2015 at 11:44 pm

    Great project!

    Reply
  11. Debbie says

    September 19, 2015 at 8:40 pm

    I’ve got three pallets that I’ve been holding on to just waiting for the perfect inspiration and this is it! Now all I need are the tools to do it with!!!! Thanks for the chance to win them!

    Reply
    • heather says

      September 21, 2015 at 6:53 pm

      Thanks for entering Debbie! I’m so glad you are inspired by my DIY pallet bar! 🙂

      Reply
  12. Meg @ Green With Decor says

    September 29, 2015 at 2:09 pm

    What a fun project – and a great addition to your deck! I’m all about using your outdoor space as much as possible when the weather is warm!

    Reply

Trackbacks

  1. The Creative Collection Link Party - Craft-O-Maniac says:
    July 22, 2016 at 5:00 am

    […] DIY Pallet Bar|Setting For Four […]

    Reply
  2. Summer Backyard Entertaining Ideas | TidyMom says:
    July 22, 2016 at 6:33 am

    […] DIY Pallet Bar Tutorial at Setting for Four […]

    Reply
  3. The Creative Collection Link Party says:
    July 22, 2016 at 4:00 pm

    […] DIY Pallet Bar  | Setting For Four […]

    Reply
  4. The Creative Collection Link Party - Giggles Galore says:
    July 22, 2016 at 4:01 pm

    […] DIY Pallet Bar|Setting For Four […]

    Reply

Leave a Reply Cancel reply

Your email address will not be published. Required fields are marked *

Recipe Rating


Hello! I'm Heather - Designer and True Color Expert at Setting For Four Interiors!
  • Amazon
  • Email
  • Facebook
  • Instagram
  • Pinterest
  • Twitter
  • YouTube

SEE OUR ONLINE INTERIOR DESIGN SERVICES!

Get interior design help from a Designer and True Color Expert! Virtual Interior Design and Paint Color Services - Setting For Four Interiors
True Colour Expert - online color design services. eDesign.
© 2011-2025 · Heather Luckhurst and Setting for Four · Log in
See my Photo Usage Policy here. ALL images and tutorials on this blog are my copyrighted material and intellectual property. Unauthorized use and/or duplication of this material without express and written permission from this blog’s author and owner is strictly prohibited. Absolutely no text or tutorials can be replicated. Copying my recipes is not allowed. To request authorization for use of my copyright material, photos, media (video or audio files), tutorials, or ideas contact me via email: settingforfour (@) gmail (dot) com | Privacy Policy
GET THE FREE BEGINNER'S GUIDE TO INTERIOR DESIGN & DECORATING!

Design secrets to create spaces you'll love!
By signing up, you agree to receive Setting for Four e-mails. Please see our privacy policy for more information. Although I'd hate to see you go, you may unsubscribe at any time. Your information will never be shared or sold to a 3rd party.
238 shares
  • 1Facebook
  • X
  • Pinterest
  • Email