DIY Restoration Hardware Inspired Farmhouse Table – with Bolted Plank Top
Looking for a distinctive, one-of-a-kind wood table with loads of farmhouse style and a small price tag? See my latest build: a DIY Restoration Hardware Inspired Farmhouse Table with Salvage Grey Wash Finish and Bolted Plank Top! It cost less than $200.00 to make!
I’m so excited to let you know that this wood table is my own custom design …and I’m sharing the instructions on how it’s made with you today!
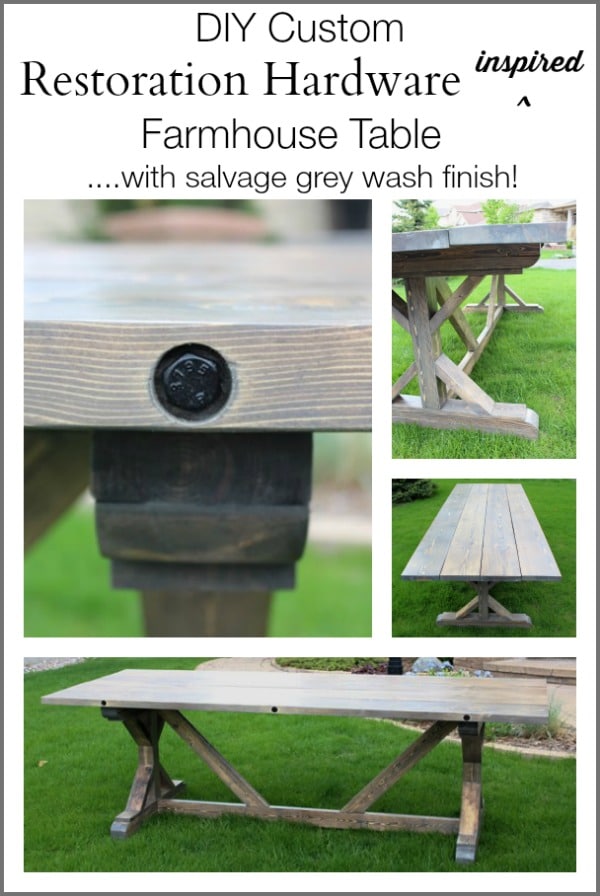
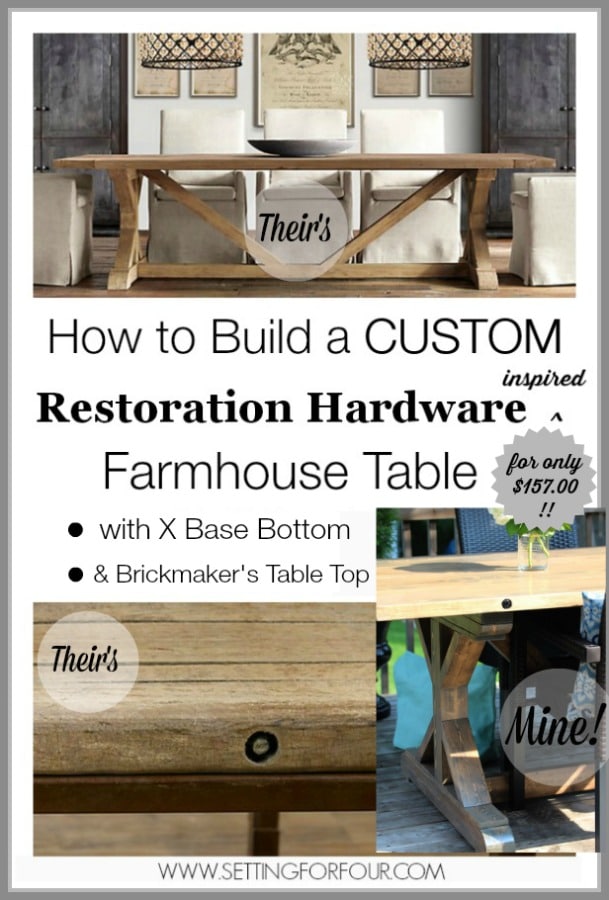
I combined two popular RH table styles, the rectangular X-base Table and the Brickmaker’s Table, to come up with this distinctive innovative design: an X-base bottom with an industrial bolted plank table top!
The Cost to Make this DIY Wood Trestle Table:
Awesome part? It cost just $157.00 total!!!! WOW!

This is my absolutely, most favorite DIY build I have made!
I’m honestly in love with everything about this gorgeous dining table!
Including:
- the customized design style (x- base farmhouse style with bolted planks on top)
- the size (8 feet long!)
- the wood finish (trendy sun-bleached grey wash)
- the combination of two popular RH looks (X Based Wood Table and the Brickmaker’s Table)
- and the best part: the price tag to make it!
Restoration Hardware X base Table Price: $3595.00 ( plus tax and shipping)
Restoration Hardware Brickmaker’s table Price: $1095 ( plus tax and shipping)
____________________________
RH Total = $4690.00
But Our price is only $157.00 Total!!!! Isn’t that amazing savings? Plus you can make this table as long or as short as you want!
DIY Dining Table Material’s and Supply List:
This post contains some affiliate links for your convenience. Click here to read my full disclosure policy.
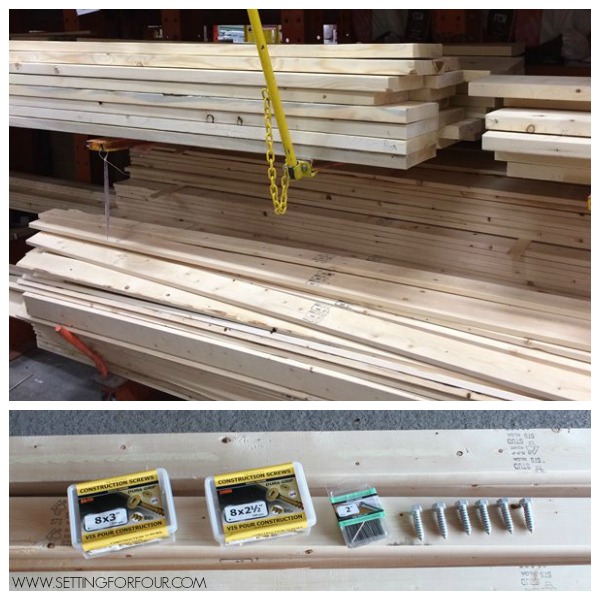
SPF Select (spruce-pine-fir) wood. ‘Select’ means that it’s 80% free of knots or defects. Use the following three sizes:
- 4 – 2×10 @ 8 feet long
- 7 – 2×4 @ 8 feet long
- 1 – 1×4 @ 12 feet long
- 3” wood screws
- 2.5” #8 wood screws
- 2” finish nails
- 6 – 1/2″x 1 1/2″ hex head Lag Bolts
- Exterior flat black spray paint
- Painter’s Tape
- Sandpaper: 80 Grit – rough initial sanding, 120 Grit – removes scratches, 220 Grit – fine finish sanding
- Wood Filler
- Exterior wood adhesive
- Safety Products : Safety eyeware clear, Particle Respirator, WorkTunes Hearing Protector
- Pre-Stain Wood Conditioner x 1 can 946 ml
- Wood Finish Stain: Dark Walnut x 1 can 946 ml
- Fast Dry Wood Stain: Sunbleached x 1 can 236 ml
- Helmsman Spar Urethane Exterior Clear Protective Finish: Satin x 1 can 946 ml
- Miter Saw
- Belt Sander – to remove really rough spots
- Orbital Sander – final finish sanding
- Cordless Drill – to pre-drill screw holes
- Electric Drill – driving screws
- Socket Set
- Screwdriver Set
- Robertson screwdriver
- Drill Bit Set
- 5/32 Drill Bit
- 1″ Spade Hole Bit
- Wood Pipe Clamps
- 3/4″ Socket + Wrench – screwing in lag bolts
- Carpenter’s Square
- Putty knife
- Carpenter’s Pencil
- paint brush
- Safety glasses
- Hearing protection
Directions to Make a Farmhouse Dining Table:
We used these these plans to assemble the table (with the addition of our own design touch: adding hex head lag bolts to the table top planks!
1. First step is to measure and cut the wood with the miter saw into the sizes outlined in the Plans. Use the square and pencil to draw out the miter lines to be cut.

2. Sand each piece smooth using the sandpaper. Start with the belt sander and 80 Grit sandpaper for the ‘rough’ initial sanding. Use 120 Grit to removes scratches in the wood. End with the orbital sander and 220 Grit sandpaper for the final ‘fine finish’ sanding. This sandpaper is so effective, it sanded the wood beautifully and has a longer sheet life than conventional sandpaper!
3. Tip: How to Fill in Cracks and Holes in Wood with Stainable Wood Filler – Fill in all holes, knots and cracks with Wood Filler – this wood filler applies easily and is stainable so it will blend in with the wood after staining! Use a putty knife to apply wood filler to large, shallow holes and cracks or a screwdriver for smaller holes. Use a knife to apply the wood filler into deep cracks.
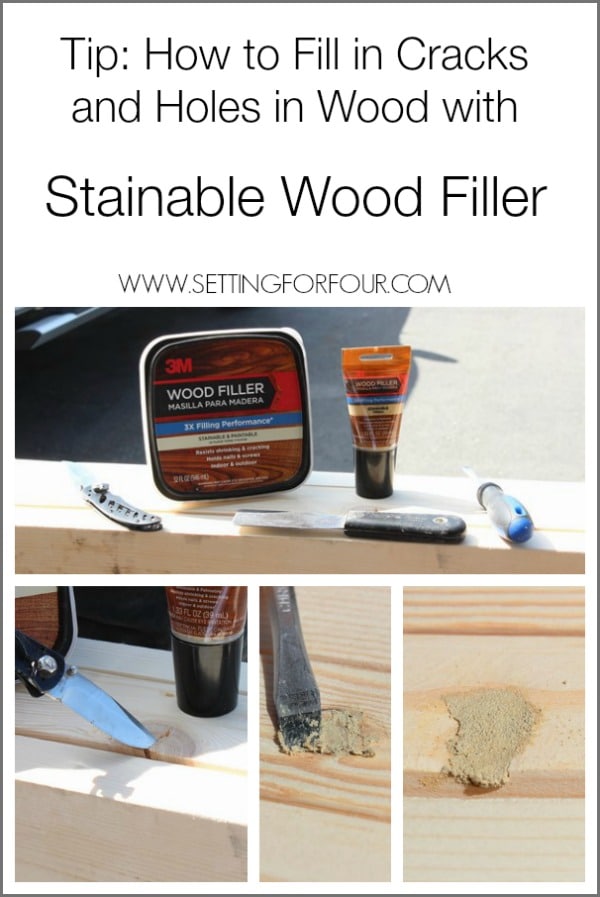
4. Sand all of these wood filled areas smooth using 220 Grit sandpaper.
5. Assemble pieces according to the Ana White Plans.
6. Use wood clamps and exterior wood glue when attaching wood pieces together.
7. Drilling Tip: When drilling, use the Painter’s Tape to mark holes to be drilled and reduce splintering from drilling. This painters tape worked great for this wood finishing trick and it left no adhesive on the wood when we removed the tape!

8. Use the Cordless Drill to pre-drill screw holes. Use the Electric Drill and the 5/32 drill bit to drive in screws. Tighten screws if necessary with the Robertson screwdriver.
9. Using 1″ Hole bit: drill 3 holes in each side of the table top (the long side) to resemble the Restoration Hardware Brickmakers Table:
10. After table is assembled apply stain and wood conditioner as follows:

11. Apply one coat of Pre-Stain Wood Conditioner according to instructions listed on can. Let Dry.
12. Apply one coat of Dark Walnut Wood Finish Stain according to instructions listed on can. Let Dry.
13. Apply one coat of Fast Dry Sunbleached Wood Stain according to instructions listed on can. Let final coat dry.
14. Apply 3 coats of Helmsman Spar Urethane Exterior Clear Satin Protective Finish according to instructions on can. Let fully dry.
15. Spray paint hex head lug nuts flat black. (You only have to paint the heads). Let dry.
16. Screw in the hex head Lag Bolts into sides of table top using the 3/4″ Socket + Wrench.
And this is the finished built X farmhouse table! I’m in love with how handsome and distinctive it is with it’s artisan look!

I love the extra industrial detail that the hex head lag bolts add!
It’s generous size will allow us to hold some large outdoor dinner parties this summer!
…and of course I love the price to make, only $157.00 ! It’s so rewarding to make your own furniture for so little cost!
I can’t wait to enjoy summer meals and refreshing drinks, al fresco, on our deck with our salvage grey wash Farmhouse Table!

Have you ever made a table for your home? If not, let me encourage you to do it!!! If I can do it – so can you!!!

~ ~ ~
Like this project? Check out my:
Summer Deck Decor Resource List to get the look!
Summer Magic with a deck conversation set
Wow, Heather! This table is gorgeous!
This is a great idea! I wish I could do it.
This is AMAZING Heather! Absolutely love it 😉
Thanks Cindy!!! I’m soooooo happy with how it turned out – our family has been enjoying it a lot this summer with dinners on our deck!!
Hi Heather,
How did you get around the boards being twisted for the tabletop?
Hi Joe – we didn’t use any boards that were twisted.
Heather, I made this table and it is beautiful. I’m wondering how your finish is holding up. Mine is completely exposed outside and the finish is peeling after 6 months. I don’t know why or exactly what to do.
It is a gorgoeus table!! Mine is holding up really well. We have it under a gazebo in the summer and in the winter we put it away since we have a lot of snow and ice.
Gorgeous Heather! Absolutely amazing!!!
Thanks so much Katie for your compliments! I can’t wait to make another one for our kitchen!
So beautiful!!! I need my husband to make me one of these!!
I’m so glad you like it Selene! Please send me a photo of your table if you decide to make one – I know you’ll love it too!
Beautiful table Heather! Thanks for the inspiration and great tips from 3M.
Pinned 🙂
Thanks Meegan for your compliments! 3M DIY has awesome tips – I agree!
Absolutely gorgeous table Heather! Love everything about it! You make me want to build one myself!
Oh Shanna!! Your sweet compliments mean so much to me!! Thanks so much!! You know I had this idea in my head…my design of the combination of those two popular Restoration Hardware Table styles and it’s so rewarding to see my vision actually become reality! If you make one please send me a picture of it!!
Love the color stain you chose…so pretty!!
I’m in love with all things grey right now Meredith – this salvage grey wash stain is just gorgeous and gives the table real character!
absolutely stunning!
Thanks Heather! Great name by the way! 😉 We are pretty wowed by it as well!! It’s a great size for entertaining and I just love the detail of the x base and the lag bolts!
wow, you two did an amazing job, very good work. This would be a great table in a big cabin in a dining room. Love that finish, would go beautifully in mountain cabin in MT. I love the grey wash look, so smooth. You should be very proud of the job you did. Enjoy it now for many outside meals with your family and friends. Happy summer days
thx for how to’s also ,pinning this.
Love it! I want one! The color is perfect and the price is too!
Debbie
Isn’t the price to make it incredible?? I’m glad you like the grey washed finish as much as I do!
WOW, the table is just beautiful!!! Great job 🙂 XO
It turned out fantastic!! I can’t wait to give it a try 😉
Yay – go for it Fotini!
Heather…wow! I’m amazed and in love w/ this table! I pinned it to my BEST board 😉 and I’m featuring it next week (as I’m sure other’s will to!) xo
Oh thanks for pinning it and featuring it too Robin! I’m so glad you love it as much as we do!!
This is absolutely gorgeous! I am actually wishing I needed a new dining room table right now!
LOL – Make one for your outdoor dining space!!! Thanks for your lovely comments Sarah!!
I am so in love with this table! You are so talented Heather! Thanks for sharing at the Twirl & Take a Bow Party. Have a great weekend!
xoxo,
Leslie
Love, love, LOVE this Heather!!! Great job!
Thanks Maryann – we’ve had lots of great meals on it with family and friends!
Turned out beautiful. Love the stain!
Thanks Pauline – the stain is so pretty! I love the color grey!
that turned out great
Thanks Marissa – I’m so happy with how it turned out too!!
Wow what a great knock off. You nailed it. The Gray wash is perfect.
Oh thanks Vidya – glad you like my design!
What a gorgeous table!
Thanks KC!
Love this!! This is such a great, and much more affordable, version!
It sure is!! At $157 – it’s much nicer on the wallet!
Very impressive, Heather! Your table is awesome!! XO
Thanks Christy – we do love it!
Wow – that is fantastic. Great job!! I want one!! Pinned!
Thanks for pinning Claire!!!
So beautiful! That looks like something you’d pay a lot of money for!
Thanks Amy – I’m glad you think it has an expensive look! I love creating things that look expensive but are easy on the wallet!
Your table looks amazing. I love the stain!
This table is gorgeous! I absolutely love the color.
I trialed several combinations of stain before I found this perfect blend of grey over the dark walnut stain – so glad you like it Shannah!
WHOA! This table is amazing! Looks like I know the next project I’m going to ask my father in law to do…
Awesome idea to ask your FIL to make it!! You will LOVE it!
Love the grey white wash! Looks better than the expensive one!
Oh thanks Julie – you just made my day with that lovely compliment!!!
Love, love , love this! What a beautiful job! I was thinking about a basic picnic table for my outside dining area, but you have changed my mind for sure!I hope I can do half as nice of a job as you did!
Thanks Teri for your awesomely supportive comments!! Please send me a photo of your table!
Absolutely gorgeous!!!! I need to make one for a friend (we don’t have the room) since they need a table. Now I need to find that Varathane stain (here in Canada) and get it done!
Love it all!!
How sweet of you to want to make one for your friend!!! She would love to get one I’m sure!!!
I absolutely love this table. We are going to start building soon but had a question… How exactly did you attach the top of the table to the legs?
Hi Amelia – the instructions for that step are in the Ana White plans which I used and linked to in my post. Hope that helps! Have fun making one!
Heather, Want to build your 157 dollar table but unable to download your supply list/instructions. Please help so my hubby and I can build. Thanks David
Hi Kathryn – there isn’t a download, you can just right click where the instructions are and print them out…. and the basic table design is here http://ana-white.com/2012/06/plans/fancy-x-farmhouse-table. I hope that helps!
this is gorgeous 🙂
Thank you Megan – we have really enjoyed using it!
This table is so beautiful! I’ve decided to tackle this and give my woodworking skills a try. One question. I want to use this as an outdoor table. I see in the one photo the boards at the end don’t look even. Is this something that can’t be left outside. I’m wondering if this lets the wood expand and contract enough for total outdoor usage.
Thank you
Hi Barbara! The boards are even at the ends and it’s an outdoor table that we leave outdoors all summer! It’s protected from the weather and elements with the outdoor sealer we used. Have fun making one! 🙂
What an amazing project Heather. I’m showing this to Bobby!!! Great job!
Thanks Yvonne!! Bobby should make you one!! 😉 We really love it – it’s the perfect size!! 🙂
Heather, this table is stunning! How many people do you think could sit around it? What chairs did you use? Thanks much, Wendy
Hi Wendy! 6- 8 people can sit at it comfortably! Our chairs are resin wicker chairs that we purchased ages ago at Home Depot. I’m so glad you love our table – we’ve gotten tons of use out of it! 🙂
I’m itching to make this but I have a large family. How many does this table comfortably seat? And how well does it clean up? I have a lot of little people under 9 yrs old. Thanks bunches!
Hi Angela! This size of table will seat 6 people comfortably – you could make it longer though I’m sure. It cleans up great! The sealer we used makes it a breeze to wipe up. I’d just make sure the boards on top are super close together so crumbs ect don’t get stuck in between the top boards. Good luck making it and send me a photo of your’s when it’s done! I’d love to see it! 🙂
I adore your stain! Any tips on how to perfect my own! I’ve been trying this combination and can’t quite seem to nail it yet!
Hi Abby – you’re probably going to see a bit of a difference depending on the graining of your wood….I suggest just keep trying to work with the character of your wood until you like the color! I know that’s not an ‘exact’ tip, but that’s what I did with our wood! I’m so thrilled you are trying it and don’t give up!! Thanks for visiting!!
Could you tell me best stain color to use for a ceiling and knee wall on a screened in porch. WE are thinking of using a tile that looks very vintage.. Blendart Natural. It has some browns and white. I can later change kneewall color but not the ceiling so it has to be something that isn’t just a fad. love your table.
I would keep the ceiling a knee wall a color that matches the white color in the tile so that the beautiful tile pops. A brown stain might clash and overpower the tile. This will let you to add any accent color of decor/pillows/ flowers ect and will allow you to switch up decor colors easily. Hope that helps!
Do you have any tips or tricks for the beveled look on the feet and under the top? I noticed Whitney just mirrored hers, but I love the beveled edge but not sure how to do it.
Hi Amy – sorry I’m not sure what you mean?
I LOVE THIS!! My husband just built a farmhouse table but we aren’t sure how to stain and protect it for outdoor use? Is this more or less weather proof? We were going to get a cover for non-summer months, but I wondered if yours is used outdoors in the elements.
Thanks!
Jen
Hi Jen! Yes – the stain and sealer that we used makes it outdoor weatherproof! We leave ours outside! 🙂 Enjoy your table!
Hi, could you please tell me if this held up to outdoor weather? I’ve read that Minwax is for interior and that the semitransparent or solid stains made for exterior would be much more resilient. But they’re not this pretty!! Thank you 🙂
Hi Jen!! Yes – it’s held up to outdoor weather because of the top coat protector that’s put on top as a final coat to seal and protect. It’s the one listed in the instructions!
Such a gorgeous table! Wow! Did you stain the legs and the table top the same? Or are the legs darker the the top? If they are different, how did you do the legs?
Thank you for the lovely compliment! Yes the legs and the top are the same stain color! Hope that helps!