Setting For Four Interiors

  • Online Interior Design Services
  • Interior Design Tips ↓
    • Christmas Decor Ideas
    • The Holiday Shop – Festive Christmas Decor
  • Paint Color Tips
  • Shop My LIKEtoKNOW.it
  • My Amazon Shop
  • Decor & Home Sales
  • About ↓
    • Welcome To Setting For Four Interiors
    • Collaborate
    • Privacy, Disclosure & Photo Usage Policy
  • Contact

Dresser Makeover with Chalky Finish Paint

by heather 22 Comments

72 shares
  • 5

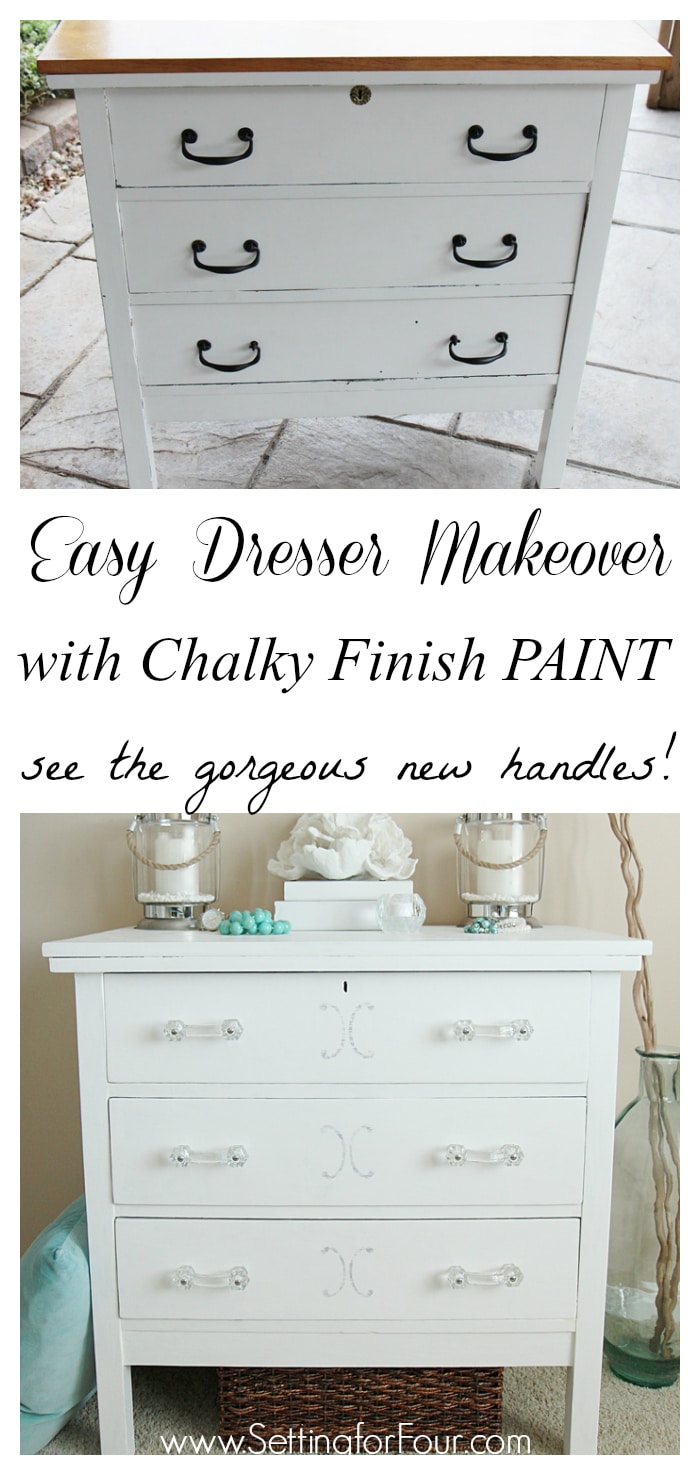
DIY painted dresser makeover with white and gray paint plus new drawer handles! See the tutorial and the before and after! Easy DIY home decor idea.

 My husband and I used to go to a lot of antique auctions when we were first married. We didn’t have much furniture so it was a way for us to buy pieces inexpensively and we love mixing antiques with newer furniture pieces for a collected look! We once bought a huge antique armoire at an auction and we lived in an apartment….let me tell you it was quite the fiasco getting it into the elevator and into our tiny apartment!! But we did it!

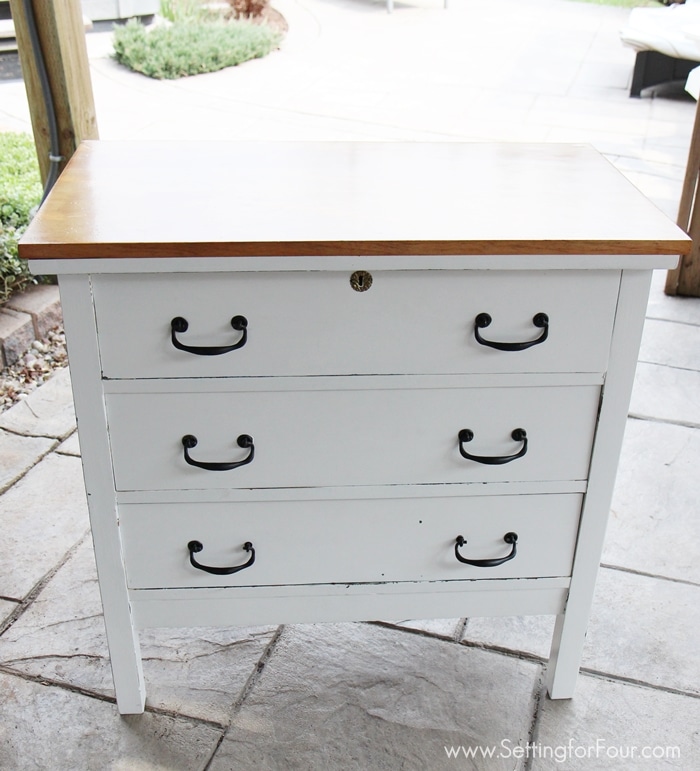
We picked up this little vintage dresser back then too for our entryway. When we bought it, it had already been painted and then at some point I painted it forest green then white. It’s been thru many military moves and has gotten pretty chipped up and dinged.

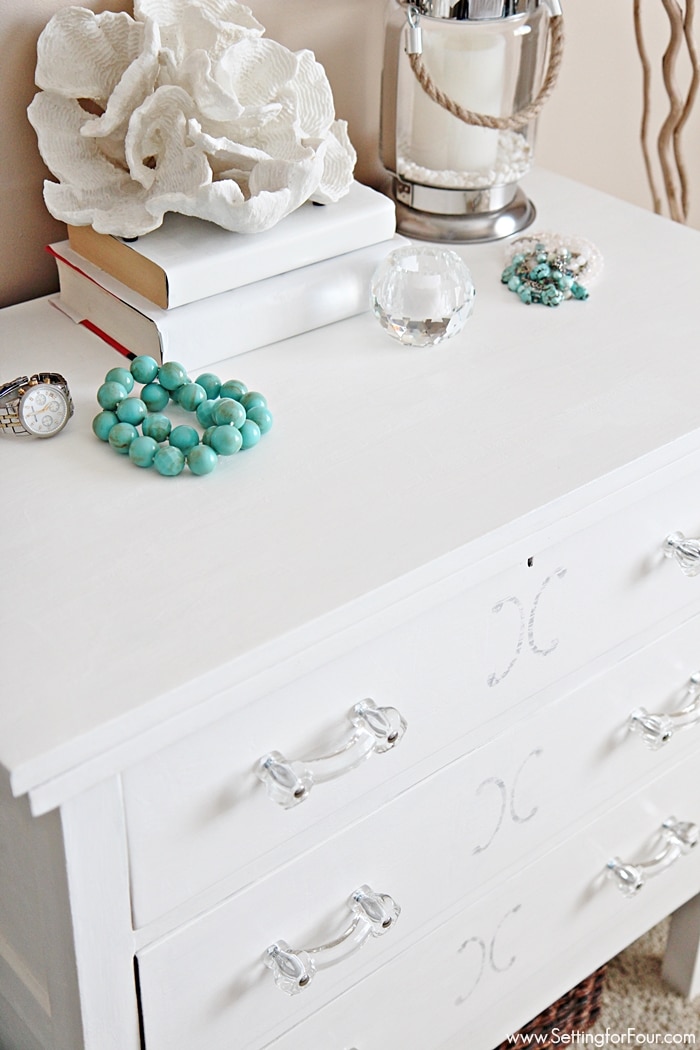
Last week I gave it a fresh, bright makeover with Decoart Chalky Finish Paint and some new glam handles. I love how gorgeous it turned out! Thank you DecoArt for partnering with me on this project! 

DIY painted dresser makeover with white and gray paint plus new drawer handles! See the tutorial and the before and after! Easy DIY home decor idea.Dresser Makeover with Chalky Finish Paint

(Here’s a before shot)

Vintage dresser makeover with Chalky Finish Paint and stencil design in grey and white! Come see the before and after at www.settingforfour.com

 Supplies:

Chalky Finish Paint in Everlasting

Chalky Finish Paint in Yesteryear

Clear Cream Wax

Waxing Brush

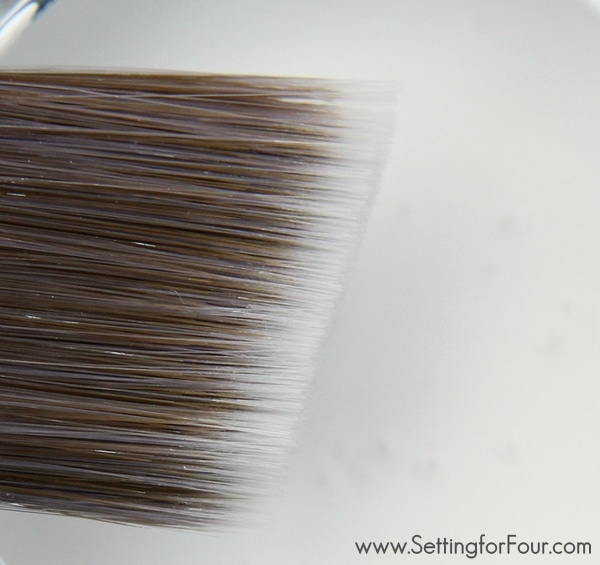
2.5 inch Brush

Stencil

1 inch artist brush

220 grit sandpaper

Glass Handles – they are gorgeous!

Directions for Dresser Makeover:

First I removed all the handles from the drawers.

Then I painted on 2 coats of Everlasting (such a pretty white color!).

DIY dresser makeover with Chalky Finish Paint and stencil design in grey and white! Come see the before and after at www.settingforfour.com

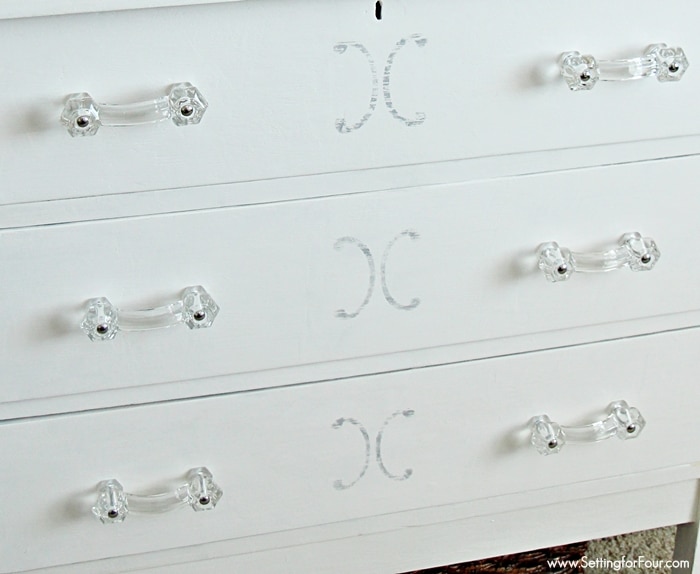
I added a stencil to the middle of each drawer using a 1 inch artist brush and  Yesteryear.

Once the stencil was dry I lightly sanded it to give it a distressed faded look. 

Next I added a coat of Cream Wax, let dry then buffed to a shine with a cloth.

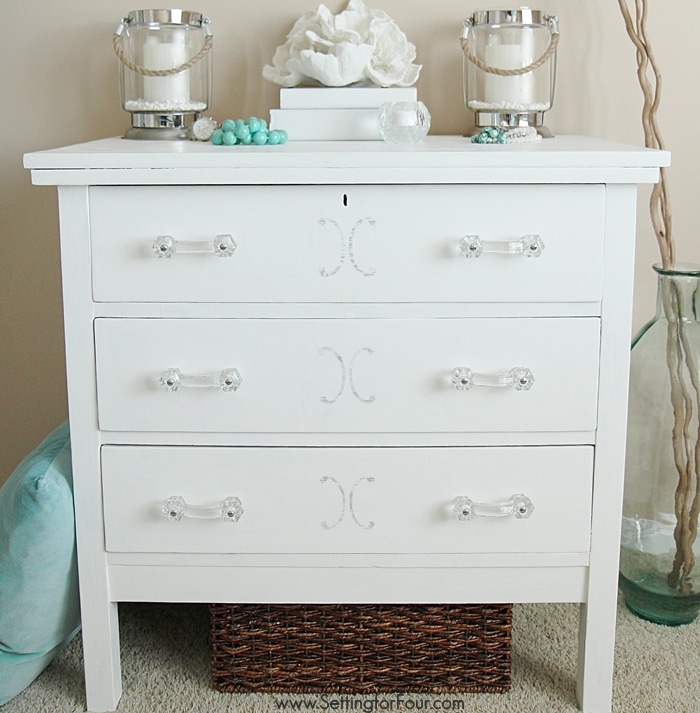
Isn’t this dresser gorgeous now? These glass handles are stunning and really fit the glam elegant look I was aiming for! I love the soft faded gray stencil design too!

DIY dresser makeover with Chalky Finish Paint and stencil design in grey and white! Come see the before and after at www.settingforfour.com

Isn’t it amazing how a bit of paint and new hardware can update a piece of furniture?

Ddresser makeover with Chalky Finish Paint and stencil design in grey and white! Come see the before and after at www.settingforfour.com

I’ve moved this dresser to our guest bedroom and styled it with a few coastal accessories!

I’m so glad we kept this dresser over the years! I think it will be the perfect spot for guests to keep their clothes.

It also gives me extra room for storing guest bedding sheet sets.

Vintage dresser makeover with Chalky Finish Paint and stencil design in grey and white! Come see the before and after at www.settingforfour.com

Have you painted any furniture lately or given an old piece a makeover with new handles? Let me know in the comments below!

You may also like:

12 Ways To Create A Cozy Guest Bedroom Your Company Will Love

7 Ways To Make A Small Room Feel Larger Instantly!

How to Paint Tile: Easy Fireplace Paint Makeover


GET THE FREE BEGINNER'S GUIDE TO INTERIOR DESIGN & DECORATING!

Design secrets to create spaces you'll love!
By signing up, you agree to receive Setting for Four e-mails. Please see our privacy policy for more information. Although I'd hate to see you go, you may unsubscribe at any time. Your information will never be shared or sold to a 3rd party.
72 shares
  • 5

Filed Under: Decor, DIY, Makeovers, Tutorials Tagged With: DIY, dresser, Makeover, Paint, stencil, tutorial

heatherHeather is a Designer, True Color Expert® and proud military wife at Setting For Four Interiors. Heather offers online Interior Design and Paint Color Services. See all of our design tips & tricks on the blog and follow us on Instagram for more design and decor inspiration!

Comments

  1. Roxie says

    May 14, 2015 at 7:29 am

    Very pretty. Would like to try this on an old dresser/desk I just remembered in the attic. We’ll see what happens. Thank you for the push. Roxie

    Reply
  2. Heather @ new house new home says

    May 14, 2015 at 7:38 am

    Looks great! I haven’t tried the Decorart paint, but it looks beautiful.

    Reply
  3. beatriz says

    May 14, 2015 at 11:13 am

    It was beautiful the color white, is a sign of peace, you creativity

    Reply
  4. Desiree @The36thAvenue says

    May 21, 2015 at 12:19 am

    Such a great makeover… Featuring you on Frida. Thank you for linking up to our party!
    xoxo

    Reply
  5. Heidi @ Happiness is Homemade says

    May 22, 2015 at 12:51 pm

    This turned out so pretty! I love the new handles, too!

    Reply
  6. Amy | The Happy Scraps says

    May 22, 2015 at 3:17 pm

    What a beautiful makeover! I love Decoart Chalky Finish paint!

    Reply
    • heather says

      May 24, 2015 at 8:22 pm

      Thank you Amy!! DecoArt’s Chalky Finish dries so quick for immediate results – I love that! 🙂

      Reply
  7. Ashley @Simply Designing says

    May 22, 2015 at 4:46 pm

    This turned out SO beautifully!

    Reply
  8. Maryann @ Domestically Speaking says

    May 22, 2015 at 8:25 pm

    So pretty Heather! Love those handles too.

    Reply
    • heather says

      May 24, 2015 at 8:21 pm

      Thank you Maryann!! Isn’t it amazing what an impact new paint and hardware can have?

      Reply
  9. Shannon @ Fox Hollow Cottage says

    May 22, 2015 at 9:18 pm

    Everlasting is such a pretty, creamy shade of white and it’s perfect on your new piece!
    Those handles though?
    The cherry on top!!
    Beautiful!!!!
    (and gorgeous pictures) ::swoon::

    Reply
    • heather says

      May 24, 2015 at 8:20 pm

      Thank you Shannon!! Those handles ‘had me’ with their sparkle!! 🙂

      Reply
  10. Malia says

    May 22, 2015 at 11:39 pm

    Great piece, Heather! Everlasting is one of my favorites!

    Reply
  11. Ashley says

    May 25, 2015 at 12:08 pm

    I absolutely love this! I have really wanted to try the chalkboard paint in a colour other than black! Very cute. I repainted an antique looking table for my baby’s room here: http://mummaknows.com/2015/05/25/favourite-new-items-for-toddler-room/

    Reply
  12. Amy Anderson says

    May 25, 2015 at 10:56 pm

    It looks gorgeous – and I LOVE those handles!

    Reply
    • heather says

      May 26, 2015 at 7:16 am

      Thanks Amy – the handles and new paint really saved this little dresser!

      Reply
  13. Jane says

    July 3, 2015 at 7:53 pm

    What a lovely makeover 🙂 I have a bedroom tall boy in desperate need of some love … I’m totally inspired now! Thanks for sharing.

    Reply
    • heather says

      July 15, 2015 at 8:20 am

      I’m sure your tall boy will look gorgeous! Thanks for visiting Jane!

      Reply

Trackbacks

  1. The Creative Collection Link Party says:
    July 3, 2015 at 4:57 pm

    […] Chalky Finish Dresser Makeover  |  Setting for Four […]

    Reply
  2. The Creative Collection Link Party - Classy Clutter says:
    July 3, 2015 at 5:00 pm

    […] Chalky Finish Dresser Makeover | Setting for Four […]

    Reply
  3. The Creative Collection Link Party - Giggles Galore says:
    July 4, 2015 at 10:03 am

    […] Chalky Finish Dresser Makeover | Setting for Four […]

    Reply
  4. The Creative Collection Link Party - Craft-O-Maniac says:
    July 5, 2015 at 6:58 pm

    […] Chalky Finish Dresser Makeover | Setting for Four […]

    Reply

Leave a Reply Cancel reply

Your email address will not be published. Required fields are marked *

Recipe Rating


Hello! I'm Heather - Designer and True Color Expert at Setting For Four Interiors!
  • Amazon
  • Email
  • Facebook
  • Instagram
  • Pinterest
  • Twitter
  • YouTube

SEE OUR ONLINE INTERIOR DESIGN SERVICES!

Get interior design help from a Designer and True Color Expert! Virtual Interior Design and Paint Color Services - Setting For Four Interiors
True Colour Expert - online color design services. eDesign.
© 2011-2025 · Heather Luckhurst and Setting for Four · Log in
See my Photo Usage Policy here. ALL images and tutorials on this blog are my copyrighted material and intellectual property. Unauthorized use and/or duplication of this material without express and written permission from this blog’s author and owner is strictly prohibited. Absolutely no text or tutorials can be replicated. Copying my recipes is not allowed. To request authorization for use of my copyright material, photos, media (video or audio files), tutorials, or ideas contact me via email: settingforfour (@) gmail (dot) com | Privacy Policy
GET THE FREE BEGINNER'S GUIDE TO INTERIOR DESIGN & DECORATING!

Design secrets to create spaces you'll love!
By signing up, you agree to receive Setting for Four e-mails. Please see our privacy policy for more information. Although I'd hate to see you go, you may unsubscribe at any time. Your information will never be shared or sold to a 3rd party.
72 shares
  • 5Facebook
  • X
  • Pinterest
  • Email