Setting For Four Interiors

  • Online Interior Design Services
  • Interior Design Tips ↓
    • Christmas Decor Ideas
    • The Holiday Shop – Festive Christmas Decor
  • Paint Color Tips
  • Shop My LIKEtoKNOW.it
  • My Amazon Shop
  • Decor & Home Sales
  • About ↓
    • Welcome To Setting For Four Interiors
    • Collaborate
    • Privacy, Disclosure & Photo Usage Policy
  • Contact

Easy Confetti Pattern Bowl DIY – Kate Spade Inspired

by heather 33 Comments

15 shares

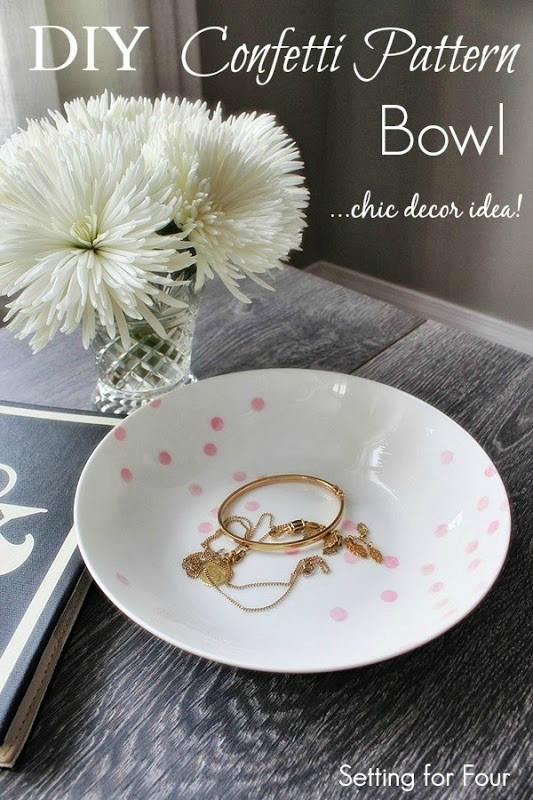
How to make an easy Kate Spade inspired Confetti Patterned Bowl DIY ideal! See this easy DIY decor project to organize and store keys, jewelry, odds and ends!

I don’t know about you, but I love beautiful bowls and plates to decorate my home with.

Today I have an easy Decorated Bowl DIY, Kate Spade inspired, using a painted confetti pattern to share with you!

Here’s the background on my confetti pattern love:

I’ve been crushing over designer Kate Spade for many years. Her handbags, clothing, shoes and home goods all have such a gorgeous classic and on trend style! She brings a sophisticated yet playful approach to all of her designs that I absolutely love.

One of the designs I’ve admired is her tabletop Confetti collection.  I created my own DIY version of this pretty pattern, in just one day, to hold my jewelry on my nightstand.

 How to make an easy Kate Spade inspired Confetti Patterned Bowl DIY idea! Great DIY decor project to organize and store keys, jewelry, odds and ends! See the tutorial at www.settingforfour.com

How to make an Easy Confetti Patterned Bowl DIY to add to your home decor!

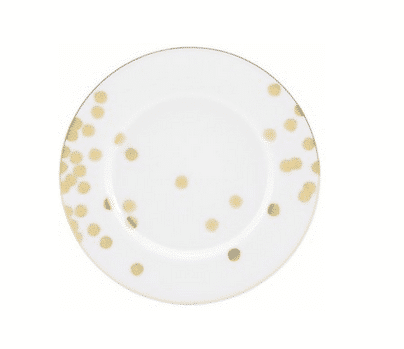
Here’s the Kate Spade version of the gold Confetti ‘Ticker Tape’ pattern:

Kate Spade gold Confetti ‘Ticker Tape’ patterned dinnerware.

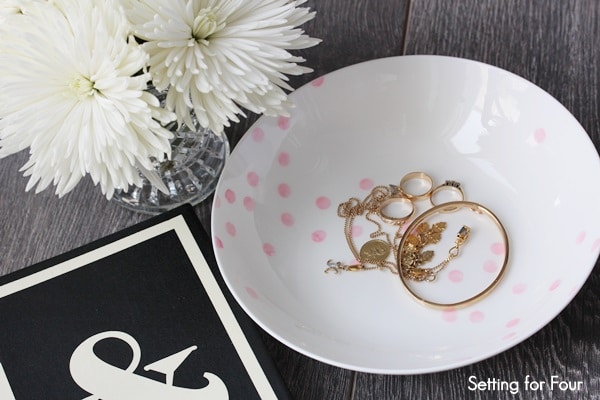
Here is my version in pink!

How to make an easy Kate Spade inspired Confetti Patterned Bowl! Great DIY decor project to organize and store keys, jewelry, odds and ends! See the tutorial at www.settingforfour.com

With Valentine’s Day around the corner this DIY confetti bowl is a great way to decorate your home with a touch of pink to celebrate ‘the day of love’!

Supplies : 

– a white bowl

– Nail polish in this pretty shell pink color

– Self-Adhesive Reinforcement Labels

First make sure your bowl is clean and dry.

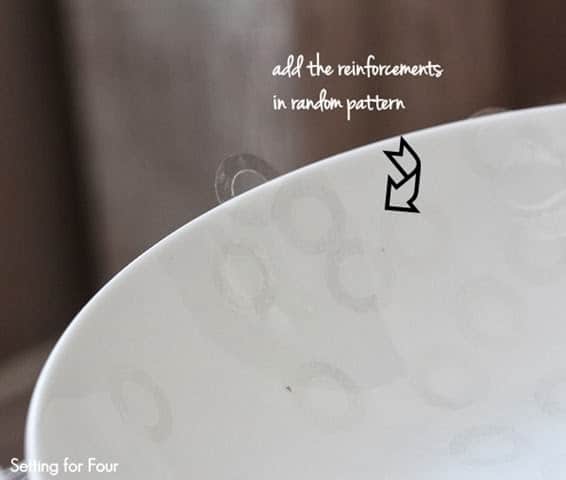
Using the picture as a guide, randomly place the reinforcements on the bowl and rub down hard to make sure all the edges are sealed. Leave some to hang off the edge too.

How to make an easy Kate Spade inspired Confetti Patterned Bowl! Great DIY decor project to store keys, jewelry, odds and ends! See the tutorial at www.settingforfour.com

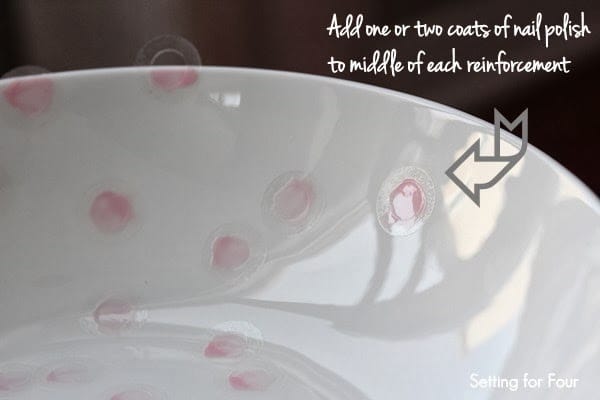
Add one coat of nail polish, and let dry completely.

How to make an easy Kate Spade inspired Confetti Patterned Bowl! Great DIY decor project to store keys, jewelry, odds and ends! See the tutorial at www.settingforfour.com

You can stop with one coat but I wanted it a bit darker so I added a second coat.

Peel off the reinforcements.

Isn’t it pretty? I love it!
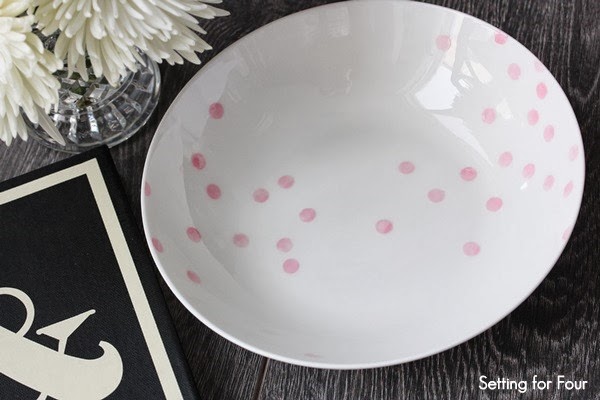
How to make an easy Kate Spade inspired Confetti Patterned Bowl! Great DIY decor project to organize and store keys, jewelry, odds and ends! See the tutorial at www.settingforfour.com 

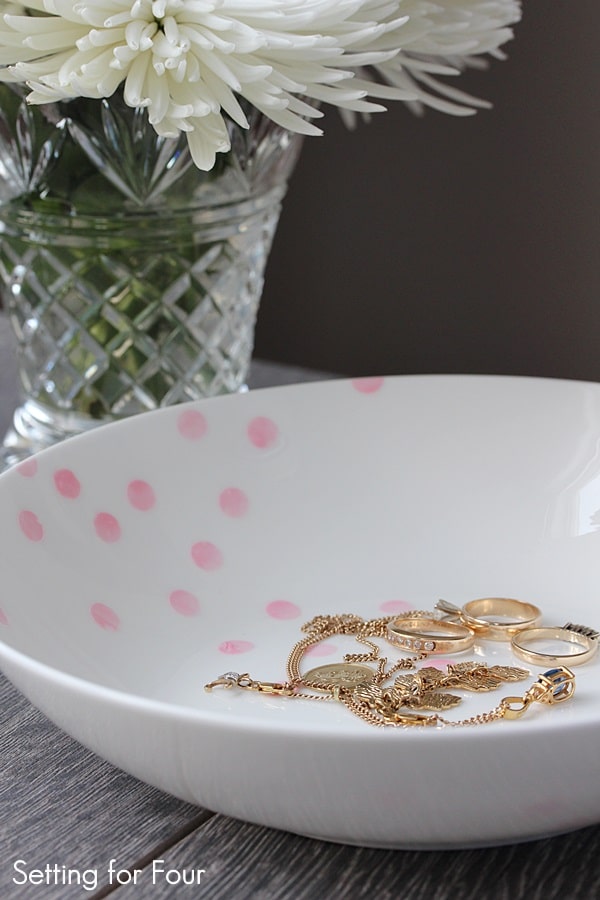
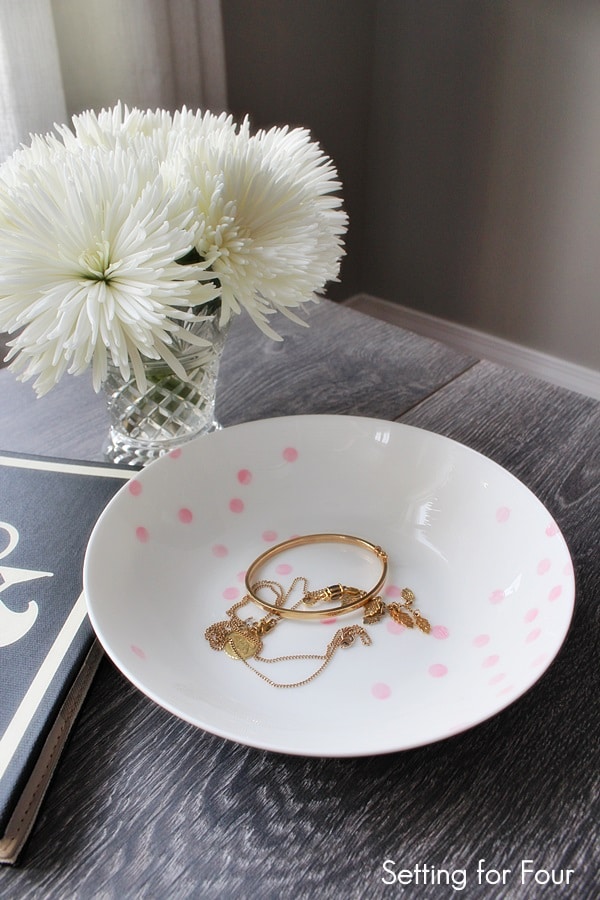
Now I have a place to put my rings, watch and jewelry beside my bed – it’s so handy and pretty to look at! 

 How to make an easy Kate Spade inspired Confetti Patterned Bowl! Great DIY decor project to organize and store keys, jewelry, odds and ends! See the tutorial at www.settingforfour.com

This decorative bowl is a great accessory to make for your home!

You can dress up a plain inexpensive bowl or plate that can be used for these storage and decor ideas:

– store your keys and sunglasses in your mudroom/front entry

-put on a coffee table to hold decorative spheres like my DIY moss balls

– hang in a plate gallery wall

– office: store and organize rubber bands, paper clips, you name it!

I hope you enjoyed my Kate Spade inspired Confetti Pattern Bowl tutorial!

How to make an easy Kate Spade inspired Confetti Patterned Bowl! Great DIY decor project to organize and store keys, jewelry, odds and ends! See the tutorial at www.settingforfour.com

This post contains some affiliate links for your convenience. Click here to read my full disclosure policy.

~ 

Today’s post is part of a fun blog hop ‘Share the Love’ Valentine’s Showcase:

…with 20 Amazing Valentine’s projects…

Today I’m joining some of my favorite blogger’s in this fun Valentine’s showcase of DIY’s, Decor, Crafts, Recipes and more!

20 amazing DIY tutorials and recipes to inspire you for Valentine’s Day!

20 DIY tutorials and recipes to inspire you for Valentine’s Day!

Monday, January 27:

  Cedar Hill Farmhouse   Setting for Four

Create and Babble

Tuesday January 28:

White Lace Cottage   So Much Better with Age

Top This Top That

Wednesday January 29:

Stone Gable   Confessions of a Plate Addict    Cupcakes and Crinolines

Hymns and Verses

Thursday January 30:

Worthing Court    Celebrating Everyday Life  Our Southern Home

You may also like:

Quick and Easy 10 Minute DIY Easter Decor Ideas
 

GET THE FREE BEGINNER'S GUIDE TO INTERIOR DESIGN & DECORATING!

Design secrets to create spaces you'll love!
By signing up, you agree to receive Setting for Four e-mails. Please see our privacy policy for more information. Although I'd hate to see you go, you may unsubscribe at any time. Your information will never be shared or sold to a 3rd party.
15 shares

Filed Under: Decor, DIY, home decor, Organizing Tips, Storage and Organization, Tutorials, Valentine's Day Tagged With: Decor, DIY, organize, Storage and Organization, tutorial, Valentine's Day

heatherHeather is a Designer, True Color Expert® and proud military wife at Setting For Four Interiors. Heather offers online Interior Design and Paint Color Services. See all of our design tips & tricks on the blog and follow us on Instagram for more design and decor inspiration!

Comments

  1. Sonya Barker says

    January 27, 2014 at 11:49 am

    This is adorable, creative and clever! Great idea ~Sonya

    Reply
    • Heather SettingforFour says

      January 27, 2014 at 12:37 pm

      Thanks Sonya!

      Reply
  2. Suzy Handgraaf says

    January 27, 2014 at 12:37 pm

    This is so pretty, Heather! I love Kate Spade too and was just admiring some of her china in TJ Maxx yesterday. You did a wonderful job of recreating the same look and feel of one of her pieces.

    Reply
    • Heather SettingforFour says

      January 27, 2014 at 3:40 pm

      She has many patterns that I love too Suzy!! Thanks for your compliments!

      Reply
  3. Christy Our Southern Home says

    January 27, 2014 at 1:02 pm

    Heather, this is such a fabulous idea!!! What a great use of those reinforcers. We have tons of those! Adorable!!!! ~Christy

    Reply
    • Heather SettingforFour says

      January 27, 2014 at 3:42 pm

      Thanks Christy! This is such an easy DIY and only 5$ too! I love the watercolor effect that the nail polish gives!!

      Reply
  4. Leslie Stewart says

    January 27, 2014 at 2:07 pm

    So cute Heather! Love the idea of using the reinforcers! Thanks for sharing!
    Leslie
    House on the Way

    Reply
  5. Atta Girl Amy says

    January 27, 2014 at 3:31 pm

    I’m a Kate Spade girl, too! I I love your take on her confetti pattern, and using those reinforcement stickers to get the circle shape perfect was just brilliant!

    Reply
  6. Marty Walden says

    January 27, 2014 at 4:39 pm

    So pretty and beautiful photos! Thanks for joining us on the tour!

    Reply
  7. Laura @ Top This Top That says

    January 27, 2014 at 4:53 pm

    that’s such a sweet idea. I would not have thought to use nail polish before seeing this….but I will now.

    Reply
  8. The Tablescaper says

    January 27, 2014 at 8:00 pm

    So cute and so adorable! I too would not have thought to use nail polish but it totally works!

    – Alma, The Tablescaper

    Reply
  9. Jamie-So Much Better With Age says

    January 27, 2014 at 10:06 pm

    This is so pretty! What a great idea. I’m sharing on my FB page today.
    Hugs,
    Jamie

    Reply
  10. Jeanie Hevener says

    January 27, 2014 at 10:07 pm

    I love decorating with plates and bowls, too, and this is so pretty. The nail polish – what a great idea. And it’s the perfect shade of pink!

    Reply
  11. Jenna LaFevor says

    January 28, 2014 at 12:12 pm

    Adorable! Would have never thought to do this with nail polish!

    Reply
    • Heather SettingforFour says

      January 28, 2014 at 3:33 pm

      The nail polish gives it a pretty watercolor effect – I’m glad you like it!

      Reply
  12. Denise Murtha says

    January 28, 2014 at 12:37 pm

    Cute and creative idea. Like Jenna…I would have never thought to do with nail polish either.

    Reply
  13. Anne says

    January 28, 2014 at 11:58 pm

    This is so cleaver and so pretty too!

    Reply
  14. Jennifer @ Town and Country Living says

    January 29, 2014 at 3:15 am

    So pretty! Love it!

    Reply
  15. Chelsea @ Making Home Base says

    January 29, 2014 at 5:58 am

    Nail polish! That’s so clever. It turned out lovely, Heather!

    Reply
  16. Kathy Moreland says

    January 29, 2014 at 1:43 pm

    Love your sweet confetti plate! Great idea!!

    Reply
    • Heather SettingforFour says

      January 30, 2014 at 1:30 am

      Thanks so much Kathy! So glad you like it too!

      Reply
  17. Lisa says

    January 29, 2014 at 9:51 pm

    So pretty! Love this easy DIY!

    Reply
  18. Sheila @sZinteriors says

    January 29, 2014 at 11:03 pm

    What a great idea, and so pretty! I never would have thought to use the reinforcements, but they make so much sense!! Thanks for the idea, and for the share!

    Reply
  19. malia says

    January 30, 2014 at 2:50 am

    Really gorgeous!

    Reply
  20. Inspire Me Heather says

    January 30, 2014 at 12:23 pm

    Your bowl looks so pretty and that’s a really great idea with the dot stickers too – thanks!

    Reply
  21. Sabrina Scrivo says

    January 30, 2014 at 4:12 pm

    This is soo pretty! I would have never thought to use reinforcement labels. Great job!

    Reply
  22. Jennifer Carroll says

    January 31, 2014 at 12:46 am

    Heather, this is so clever!! What a brilliant idea to use a handy office-supply to get perfect dots!! Love this!

    Reply
  23. Allison {A Glimpse Inside} says

    January 31, 2014 at 4:50 am

    This is so pretty and SO easy!!
    Thanks for linking up to this week’s Catch a Glimpse Party. I’ll be featuring this tomorrow. 🙂

    Reply
  24. Andrea Hunter says

    January 31, 2014 at 3:53 pm

    How pretty! I love this idea!

    Reply
  25. Selene @ Restoration Beauty says

    January 31, 2014 at 7:00 pm

    This is so easy and pretty!!! Definitely something I will try soon!!

    Reply
  26. Daniela Duriavig says

    February 2, 2014 at 5:17 pm

    What a great idea to use nail polish! Looks so pretty.

    Reply
  27. Heather says

    February 3, 2014 at 1:13 am

    So pretty! Love it!

    Reply
  28. Krista thehappyhousie says

    February 3, 2014 at 3:18 pm

    So pretty Heather! I love the idea of using the reinforcements – and nail polish!! Wow!! I just may have to ‘borrow’ this idea. Pinned:)

    Reply

Leave a Reply Cancel reply

Your email address will not be published. Required fields are marked *

Recipe Rating


Hello! I'm Heather - Designer and True Color Expert at Setting For Four Interiors!
  • Amazon
  • Email
  • Facebook
  • Instagram
  • Pinterest
  • Twitter
  • YouTube

SEE OUR ONLINE INTERIOR DESIGN SERVICES!

Get interior design help from a Designer and True Color Expert! Virtual Interior Design and Paint Color Services - Setting For Four Interiors
True Colour Expert - online color design services. eDesign.
© 2011-2025 · Heather Luckhurst and Setting for Four · Log in
See my Photo Usage Policy here. ALL images and tutorials on this blog are my copyrighted material and intellectual property. Unauthorized use and/or duplication of this material without express and written permission from this blog’s author and owner is strictly prohibited. Absolutely no text or tutorials can be replicated. Copying my recipes is not allowed. To request authorization for use of my copyright material, photos, media (video or audio files), tutorials, or ideas contact me via email: settingforfour (@) gmail (dot) com | Privacy Policy
GET THE FREE BEGINNER'S GUIDE TO INTERIOR DESIGN & DECORATING!

Design secrets to create spaces you'll love!
By signing up, you agree to receive Setting for Four e-mails. Please see our privacy policy for more information. Although I'd hate to see you go, you may unsubscribe at any time. Your information will never be shared or sold to a 3rd party.
15 shares
  • Facebook
  • X
  • Pinterest
  • Email