DIY Tray Tutorial Using Tile and Cabinet Handles
Learn how to make this beautiful tray with this easy DIY tray tutorial using tile and cabinet handles – what a great way to use leftover tile from a kitchen or bath renovation – or create a tray using pretty Carrara marble tile! This is a quick and easy, inexpensive tray to make that’s perfect to organize your perfume and jewelry in your bedroom/bathroom, display books and decor on a coffee table, centerpiece idea for your dining table or as a food and drink serving tray when you’re entertaining. Such a gorgeous wedding, anniversary, hostess or holiday gift idea too!
Don’t forget to enter my $100 Amazon Gift Card Reader Appreciation Giveaway (information is at the bottom of the post!)
This is a throwback Monday post – a great DIY tray to make for the upcoming holidays as handmade gifts! Of course make one or two up for yourself as well!

This post contains some affiliate links for your convenience. Click here to read my full disclosure policy.
DIY Tray Tutorial Using Tile and Cabinet Handles
Decorating my home on a budget, repurposing items and creating my own home decor are some of my big passions… I love to create one of a kind items for my home; the kinds of things that give my home personality and unique style.
Most of all I love sharing my DIY adventures with all of you! Today I’m sharing my step-by-step DIY tutorial for this gorgeous marbled gray tray so you can make one too.
Here are 5 creative ways you can use this DIY tray:
- You can use this DIY tray to store and display your jewelry, nai lpolish and perfume on your bathroom vanity or on your bedroom dresser:
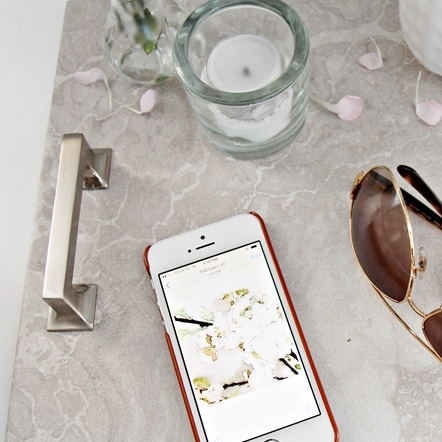
- In your foyer as a place to stash your cellphone, keys and sunglasses

- Use it to display books, candles and decor on a coffee table
- Centerpiece idea for your dining table – add a vase of flowers to it, a bowl of fruit, or a few candlesticks….you name it!
- As a food and drink serving tray when you’re entertaining.
Make a few of these trays up for these 7 thoughtful DIY gift ideas:
- Wedding gift
- Anniversary gift
- Hostess gift
- Teacher gift
- Housewarming gift
- Christmas or Birthday gift
- Us it in a DIY gift basket – place it under a wicker basket filled with goodies and wrap it all in cellophane gift wrap, ribbon and a tag!
DIY Tray Tutorial Using Tile and Cabinet Handles
Supplies:
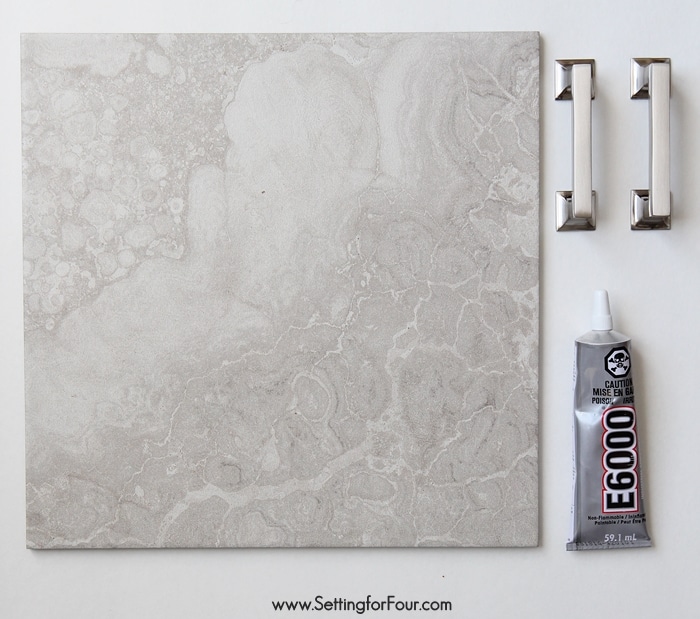
- 1 tile 12″ x 12 ” like this gray marbled style or this Carrara marble style – your choice of color and pattern. You can even use a rectangular sized tile.
- 2 of these 3 inch satin nickel cabinet handles
- Industrial Strength Adhesive – this is the BEST stuff I love it!
- Painter’s tape
- 4 felt pads
- Paint designed for tile
Total cost = $20.00! So inexpensive!
This is how I made my DIY tray – it’s super quick and easy!
1.First use the painter’s tape to mark where you’d like the cabinet handles to sit on the tile in a centered position. These tape lines will act as a guide.

2. Attach each cabinet handle to the tile with E6000 adhesive following the adhesive instructions. Let adhesive dry.
3. Attach a felt pad to each bottom corner of the tile.
4. Paint the edge of the tile with a coat of gray paint to cover up the bare edge.
Note: Make sure you test that the handles are attached strongly because you won’t want them to pull off your tray and damage your floor or hurt your feet, if you will be carrying it around!
That’s it! Now enjoy your gorgeous new tray!
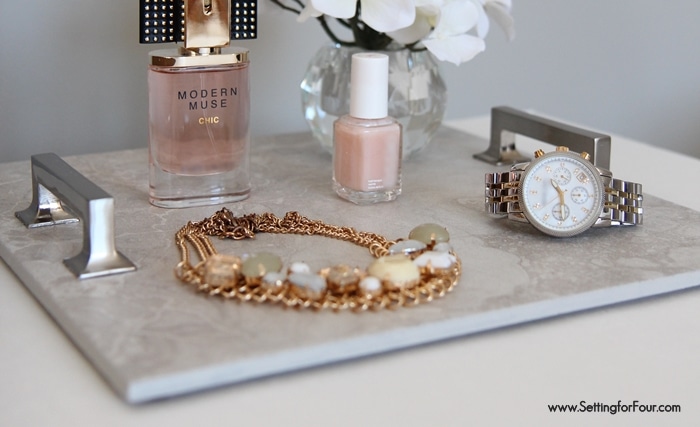
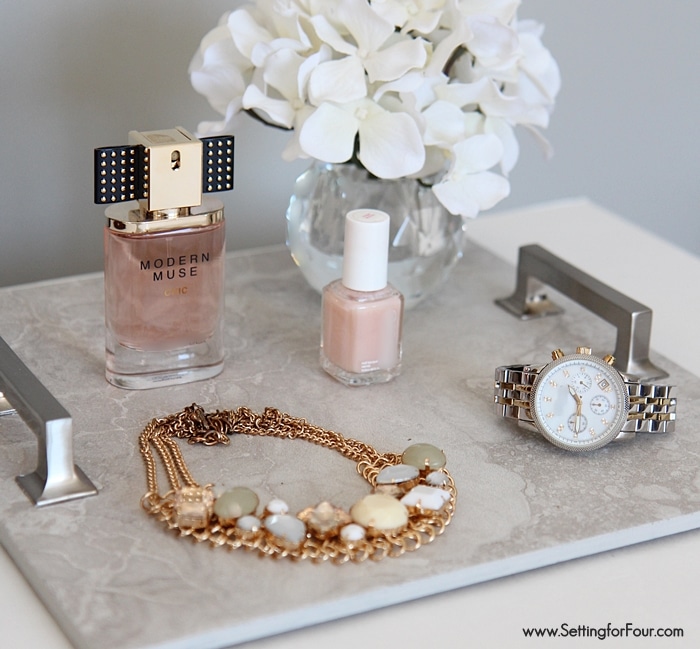
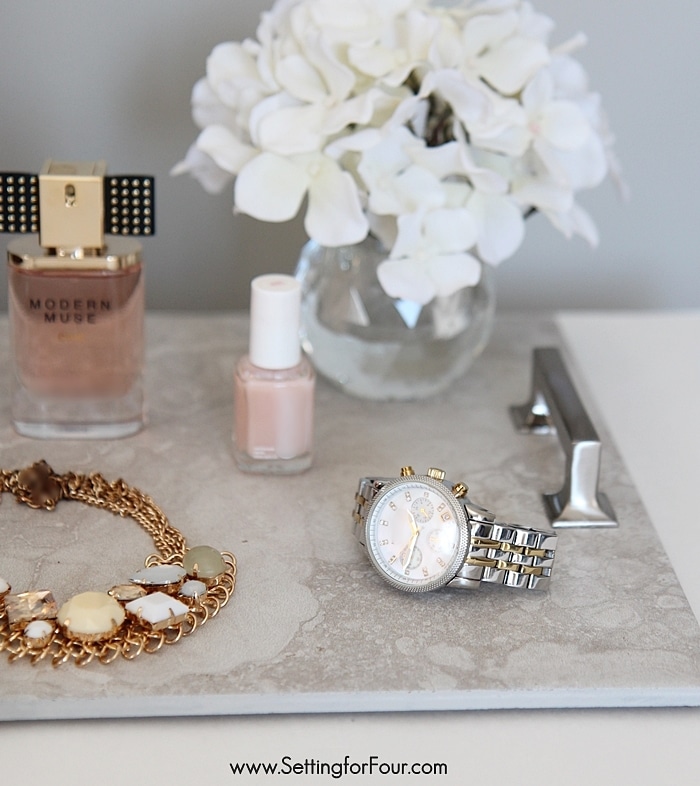
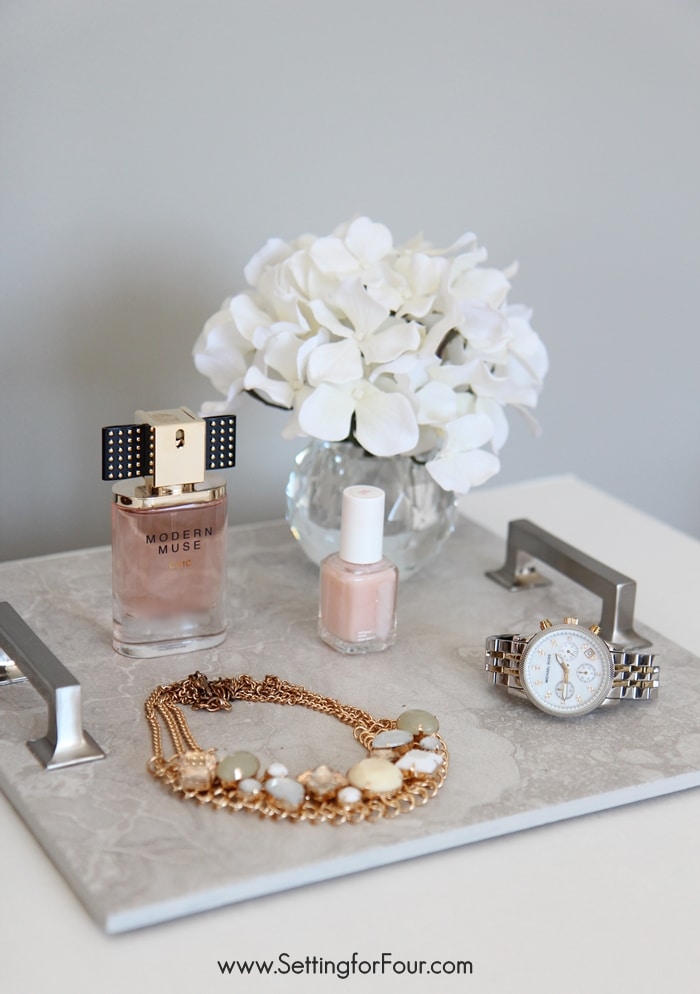
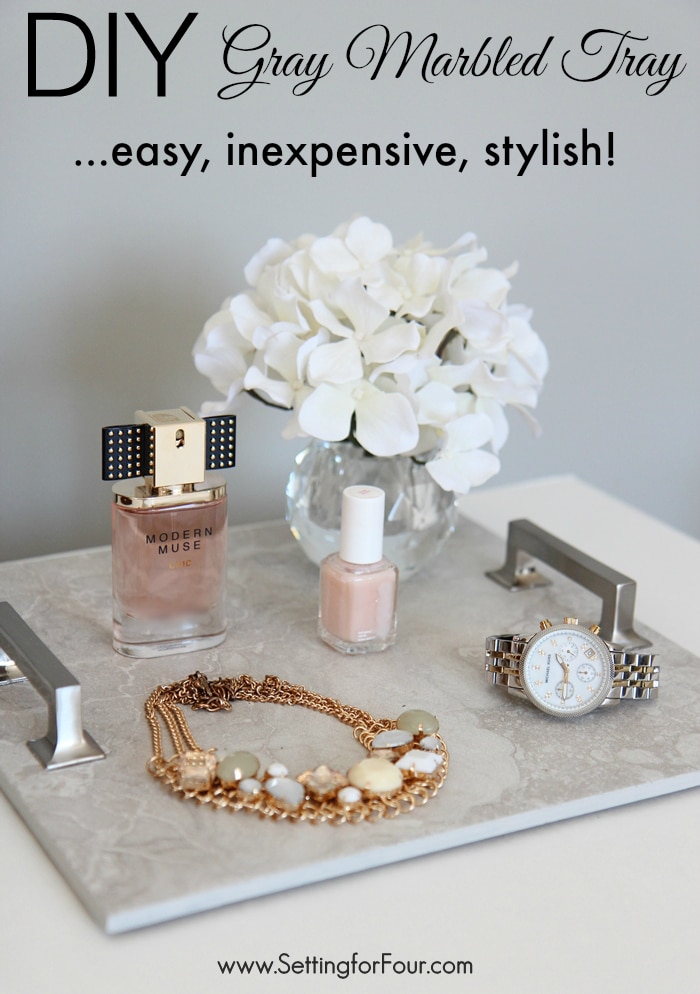
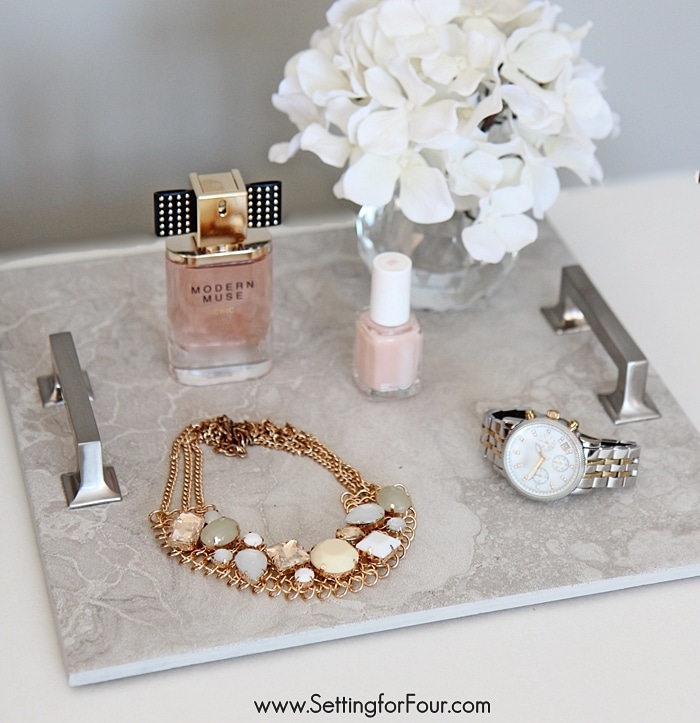
I love the gray and beige swirls and the marbled style of this tile. It looks and feels like real crosscut limestone! I’m a big gray lover so this really fits into my decor.
The satin nickel finish and shape of these cabinet handles are stunning too!
I’m using my tray on my vanity for storage and display – to hold my jewelry, perfume and a small crystal votive of flowers.
I think I’ll make one up using Carrara tile too!
I love this tray so much I’m going to make a bigger version for our outdoor DIY Restoration Hardware Knock Off Farmhouse table… for summer dining and entertaining!
I hope you like my DIY Tray Tutorial Using Tile and Cabinet Handles and make one or two up for yourself and your friends!
Don’t forget to enter my Reader Appreciation Giveaway!
Leave a comment on any of my blog posts for a chance to win a $100 Amazon gift card. Open to USA and Canada.
The more comments you leave the more entries you have!


Great idea, Heather!
Thanks so much Starr – have a wonderful day! xo Heather
I am going to try to do this as gifts for Christmas. Great instructions!
This is a great idea. It is going on my “to do” list. Thank you for sharing it.
You’re welcome Kae – have fun making this tray! 🙂
This is the best idea ever! I see beautiful tiles in Habitat Restore all the time- and now I know what to do with them. What nice gifts my family will receive this Christmas and lots of love put into them without a lot of cost and time. I’m so inspired!
Great Barbara – yes they would be perfect for this project!! You’re family will love getting a DIY tray for the holidays – so thoughtful!! xo Heather
Making one of these to corral my stuff! Beautiful.
I found you in Better Homes and Garden, while sitting in fed office! I like your ideas DYI what is the best gray paint you talk about? I like this color!
Hi Joan – I’m so glad you found my website! That gorgeous gray paint color and all of my home paint colors are here: https://www.settingforfour.com/paint-colors-home/ Hope that helps and thanks again for visiting my blog! xo Heather
First time blog follower at age 65 (never too old) but what really caught me was your passion for making all things gray come alive and your common sense when putting ideas to paper and then to the real thing, I first read about you in this months BHG and followed the Yellow Brick Road, I watched your video at the Laz-E Boy Showroom, what a kick! I fell in love with the rug selection and the gray recliner was actually something I could live with (my husband was so happy when I showed him the pictures, as I had been pretty firm on no recliners ever in the past). And the really funny thing is I had just been to Sherman Williams and was sure I had every gray selection possible….so back I head to get ‘Mindful Gray’…….
Hello Sherry and welcome to my blog! I’m so glad you found me from my BHG feature! Thank you for all of your beautiful compliments – they really made my day. Those gray recliners I used in the Design Dash video really are gorgeous – and they certainly don’t look like recliners – I think you and your husband will love them….and La-Z-Boy has so many fabrics and trim to choose from too. Mindful Gray is my go-to gray – it’s a warm, liveable gray – we just love it! In fact we just painted our downstairs bathroom with it! Thank you for following along with me and have a gorgeous week Sherry!
What a clever idea this is! I now am going to garage to get a left over tile to do this today!!
Oh great Denise! So glad to hear that you’ll be making this tray! I’m glad you have leftover tile to use for it – have fun making and using it! 🙂
Great idea!
THank you Chris! xo Heather
Wow, beautiful Heather! So easy! I love the styling of your tray with the jewelry and perfume! So stylish! Thanks for this tutorial!!
You’re welcome Babette! Glad you like this DIY tray project!
This is so pretty! You are so talented — I’m afraid I’m not, but this looks pretty easy to make! Even for me.
Digicats {at} Sbcglobal {dot} Net
I love this project. My bathroom counter is always a mess!
I love these trays. Nice to know you don’t have to drill holes for the handles but you have to find the handles that go flush with the tiles.
This I am going to try!
Yay! Have fun making this tray Barbara!