Inspiring interior design and decor tips to create a beautiful home!
Update your rooms and refresh your spaces with these amazing ideas from a Designer and True Color Expert!
Follow me on Instagram for inspiring design ideas, trends and styling ideas!
 65 plus Photo Gallery Wall Layout Ideas
 Small Bedroom Ideas To Maximize Space & Style
 How to Arrange Living Room Furniture With a Fireplace
 Why Your Home Feels Off And the Designer Secrets to Fix It
 Sherwin Williams Evergreen Fog Color Review
 Virtual Interior Design Services by a True Color Expert®
 How To Arrange Furniture In A Long Living Room
 Paint Color Trends Of 2026 That You Need To Know!
 2026 Interior Design Trends for Everyday Homes
 Organic Modern Bedroom Design: Calm & Cozy Aesthetic
 How To Make A Small Living Room Feel Larger!
 How To Create A Cozy Living Room
 10 Designer Tricks to Make a Small Space Feel Bigger
 2025 Christmas Tree Trends — Expert Design Advice
 Benjamin Moore Color Of The Year 2026 -Silhouette AF-655
 How To Arrange Furniture With An Open Concept Floor Plan
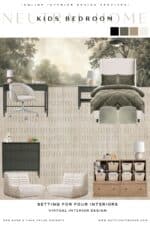 Neutral Kids Bedroom Ideas: Stylish & Functional Design Tips from a True Color Expert
 Sherwin Williams Color of the Year 2026: Universal Khaki
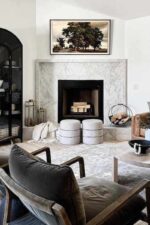 How To Arrange Furniture With A Corner Fireplace
 10 Stylish Halloween TikTok & Instagram Decor Ideas
 Fall Decor Ideas: Your Guide to the Coziest Season
 Elegant Woodland Christmas Tree Decor Ideas
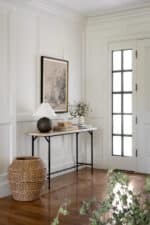 How To Fake An Entryway – Enter Right Into The Living Room
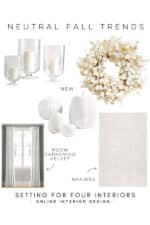 Neutral Fall Home Trends
 Sherwin Williams Urbane Bronze SW 7048 Color Review
 August Home Checklist – Home Improvement Tips
 Living Room Toy Storage Ideas For Stylish Homes
 7 Simple Summer Bedroom Decorating Ideas
 Easy Summer Decor Ideas and Design Trends To Update Your Home
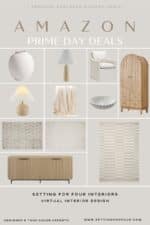 Best Amazon Prime Deals So Good You’ll Want to Redecorate Now
 Repose Gray – Undertones & Coordinating Colors
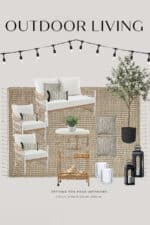 How To Create A Stylish, Budget Friendly Outdoor Oasis
 Top 50 Bestselling Paint Colors At Sherwin Williams
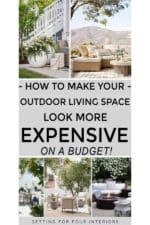 Inexpensive Ways To Make Your Outdoor Space Look Expensive
 Sherwin Williams Quietude Paint Color Review
 Winter White Decor Ideas For A Cozy & Timeless Home
 How to Choose the Perfect Area Rug
 Agreeable Gray – Undertones & Coordinating Colors
 The Paint Color Trends Of 2025 That You Need To Know!
 What to Decorate and Make in January!
 Gifts for Her Christmas Gift Guide
 Soothing Bedroom Color Schemes
 Easy Christmas Bar Cart Decor & Styling Ideas
 November Home Checklist – Home Improvement & Home Decor Ideas
 Elegant Fall Living Room Decor Ideas To Celebrate Autumn!
 How To Set Up A Flocked Christmas Tree To Minimize Flock Shedding
 The Holiday Shop! Festive Christmas Decor & Inspiration
 The Best Tips for Planning Your Holiday Decor
 October Home Checklist – Home Improvement & Fall Home Ideas
 Elegant Fall Entryway Decor Ideas
 5 Ways To Create A Whole Home Paint Color Scheme
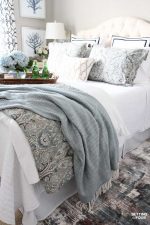 Cozy Guest Bedroom Must Haves Your Company Will Love
 April Home Checklist – Home Improvement Tips
 Get Paint Color Help From A True Color Expert®
 New Bedroom Updates – Elegant Wall Decor, Bedding and Lamps
 How To Decorate A Room In 5 Simple Steps
 Inexpensive Ways to Make Your Home Look Expensive!
 How to Make A Mood Board For Interior Design
 5 Cozy Small Spaces And Nook Ideas
 How To Arrange Furniture In A Small Living Room
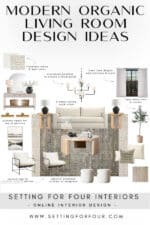 Modern Organic Living Room Design Ideas
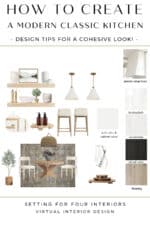 Modern Classic Kitchen Design Ideas
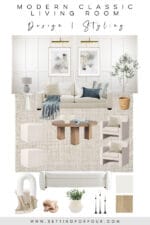 Modern Classic Living Room – Design & Styling Ideas
 How to Make Your Home Look Cohesive and Pulled Together – The Right Way!
 How To Cover An Ugly Carpet
 How To Identify Paint Color Undertones – To Choose The Right Color
 Best Furniture and Decor Sales!
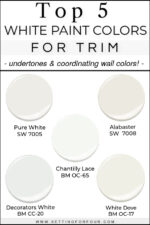 5 Best White Trim Paint Colors
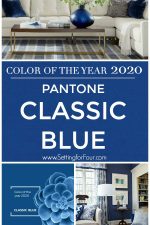 How to Decorate with Pantone Color Of The Year 2020 Classic Blue
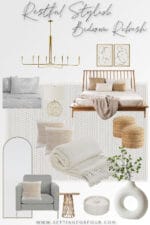 Restful, Stylish Bedroom Refresh Ideas
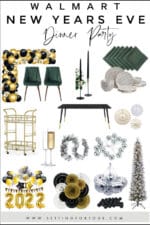 Walmart New Year’s Eve Dinner Party Decor
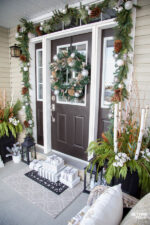 Festive, Elegant & Neutral Christmas Porch Decor Ideas
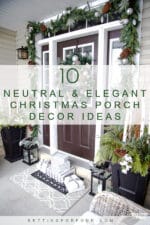 Neutral and Elegant Christmas Porch Decor Ideas
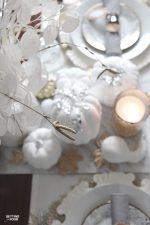 Budget Friendly Elegant Table For Thanksgiving – Decor Tips!
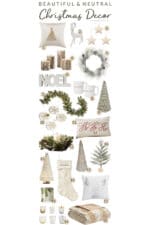 Beautiful & Neutral Christmas Decor Ideas For The Home
 Easy Bling Pumpkin DIY With Rhinestone Stickers
 Elegant White & Gold Thanksgiving Table Setting
 Stylish & Chic Holiday Dining Room Decorating Ideas
 The Best Artificial Christmas Trees To Deck Your Halls
 Behr Back To Nature Paint Color – Undertones & Coordinating Colors
 Chic Neutral Living Room – Walmart Home
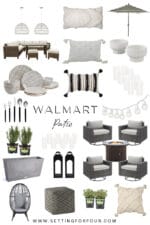 Beautiful Patio Makeover Ideas with Walmart!
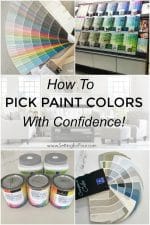 How to Pick Paint Colors With Confidence!
 Exciting Ways To Decorate With Pantone Color of the Year Living Coral
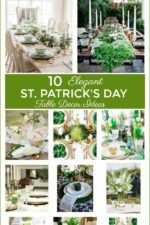 10 Elegant St Patricks Day Table Decor Ideas
 What to Decorate and Make in February!
 5 Ways to Decorate With Fiddle Leaf Fig Trees & Best Faux Options!
 5 Easy Winter Decorating Ideas After Christmas
 Happy Holidays!
 Elegant Christmas Living Room Decor Ideas
 Fun & Fabulous New Year’s Eve Party Supplies & Decor
 Elegant Crystal, Gold and White Christmas Tree Decor
 Why I Love the Lutron Caséta Wireless Smart Lighting System!
 Elegant Blue and White Christmas Bedroom Decor Ideas
 Elegant White & Gold Christmas Kitchen Decor Ideas
 The Best Black Friday Sales On Furniture & Decor
 How To Make A Marble Table Runner
 4 Fall Entryway Decor Ideas: Simple Ways To Welcome Autumn Into Your Home
 6 Fall Porch Decorating Ideas To Celebrate Autumn!
 How To Make Your Kitchen Bright and Cozy For Fall
 What to Decorate, Make and Do in September
 My Favorite Fall Wreaths
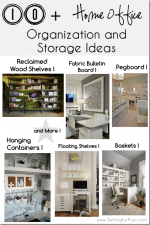 10 + Helpful Home Office Storage and Organizing Ideas
 How To Decorate Your Living Room For Summer
 Elegant Living Room Decorating Tips for Summer
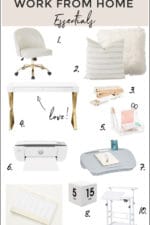 10 Beautiful, Modern, Classic Work From Home Essentials
 Elegant Spring Living Room Decorating Ideas
 Light and Bright Spring Kitchen Decor Ideas
 Inexpensive Ways To Stage Your Home To Sell Quickly!
 Floral Arrangement With DIY Easter Egg Filler
 Resilient Flooring Guide: Everything You Need To Know!
 New Wall Art In The Family Room
 Top 10 Blog Posts of 2019
 Elegant, Welcoming Christmas Entryway Decor Ideas
 Elegant Gold and White Christmas Kitchen Decor Ideas
 The Best Pre-Black Friday Sales & Deals!
 Elegant Gold and White Flocked Christmas Tree
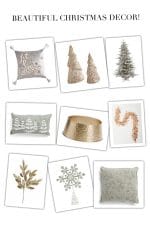 Beautiful & Affordable Christmas Decor Ideas For The Home
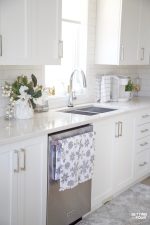 Easy No Sew Pom Pom Tea Towels
 Hot Sales & Promo Codes – Furniture, Decor, Beauty
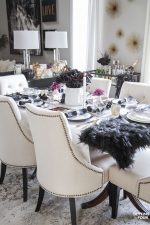 Easy Elegant Halloween Table Decorations & Centerpiece Idea
 Fall Kitchen Decor Ideas – Kitchen Island, Countertops and More!
 How To Decorate a Cozy Family Room For Fall – 5 Ways
 32 Beautiful Fall Pumpkin Decorating Ideas
 Neutral Glam Fall Entryway and Family Room
 Nordstrom Anniversary Sale Early Access Picks
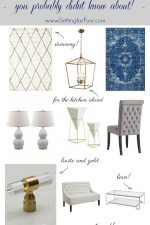 Beautiful Furniture & Home Decor On Amazon
 36 Stunning Trestle Tables You’ll Love!
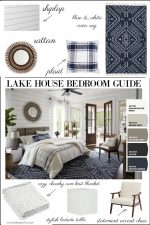 Lake House Bedroom Paint Color Ideas, Furniture & Decor Ideas
 The BIG Mistakes You’re Making Choosing A Roof Shingle Color
 Color of the Year 2020 – Chinese Porcelain Blue by PPG Paints
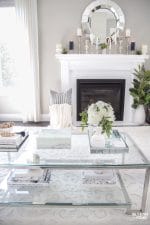 5 Elegant Summer Mantel Decor Ideas
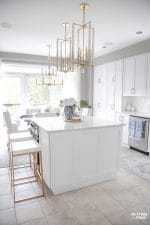 Summer Kitchen Decor Ideas & Summer Home Tours
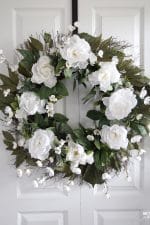 Easy DIY Peony Wreath For Summer – Under 30 Minutes
 July 4th Sales Have Arrived! Sale Info & Promo Codes!
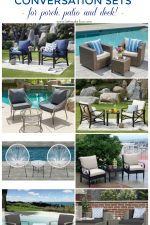 Affordable 3 Piece Conversation Set Ideas For The Patio, Porch & Deck
 Patio Design Ideas & Outdoor Patio Heater Giveaway!
 Mother’s Day Gift Ideas She’ll Actually Love To Get!
 Easy Spring Bathroom Refresh & Bath Towel Giveaway!
 Painting Fireplace Tile – 9 Ways to Update Your Fireplace
 Beautiful Artificial Flowers for Bouquets and Wreaths
 Drew Barrymore’s New Home Collection at Walmart called Flower Home!
 10 Minute Decor Ideas to Transition Your Home for Springtime
 5 Simple Spring Entryway Decor Ideas
 Quick & Easy Bifold Doors Makeover On A Budget!
 Beautiful Houseplants That Ship To Your Door!
 How to Create a Mirror Gallery Wall
 Tips for Decorating with Area Rugs
 Understand The Color Wheel & Color Schemes To Become A Better Decorator
 7 New Year’s Eve Bar Cart Decor & Entertaining Ideas
 Merry Christmas Friends!
 35 Magical Christmas Lights At Night Home Tours
 Christmas Mantel Decorating Ideas With Deer, Stockings & Decorative Christmas Picks & Sprays
 Our Dark to White Kitchen Remodel Before and After
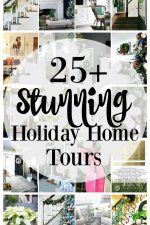 25 Plus Stunning Christmas Home Tours & Decor Ideas
 Silver & Gold Flocked Christmas Tree Decorations
 Elegant Silver and Gold Christmas Entryway Decor Ideas
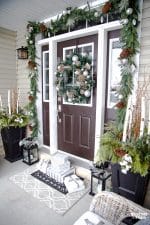 Mixed Metallics Christmas Porch Decor & Holiday Living Room
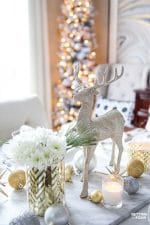 Styled and Set Christmas Table Decor Ideas
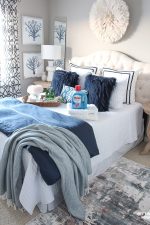 11 Cozy Guest Bedroom Ideas For The Hostess!
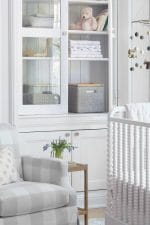 10 Essential Ideas for an Elegant Nursery
 Choosing Our Bedroom Paint Color – Sherwin Williams Pure White
 TV Wall Decor Idea – Decorate With A Juju Hat!
 How to Style & Decorate With Artificial Flowers & Plants
 Simple Fall Porch Decorating Ideas With Big Impact
 How to Create A Beautiful Pergola Dining Area – Furniture, Rug, Lighting, Table Setting & Decorating Ideas
 Your Guide to Choosing Cabinets For Your Kitchen & Bathroom
 15 Beautiful Pumpkin Decor Ideas and Easy Pumpkin Recipes
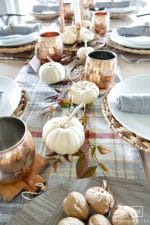 25 Gorgeous Fall Table Setting Ideas
 Dreamy Blue And White Master Bedroom Favorites
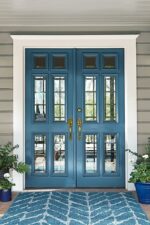 Blueprint Paint Color By Behr – Color Of The Year 2019
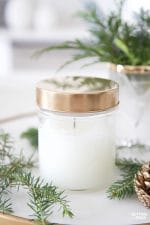 DIY Forest Pine Candle In A Jar
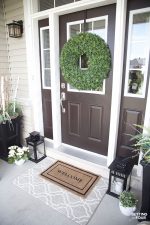 Easy Affordable Home Refresh Ideas
 How To Pick A New Faucet & Faucet Design Ideas!
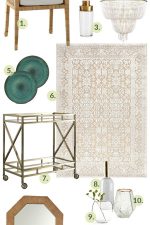 Must Have Finds for a GORGEOUS Dining Room Refresh
 12 Curb Appeal Design Elements & Porch Decor Tips
 Easy DIY Throw Pillow Cover
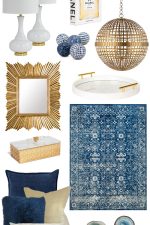 The Best Transitional Glam Living Room Pieces
 5 Ways To Add Coastal Style To Your Home
 Build Your New Construction Home The Easy Way With HomLuv
 Favorite Things – Home Decor, Fashion & Weekend Sales!
 Night Watch Color Of The Year 2019 Paint Color
 Memorial Day Weekend Sale Alerts and Savings Codes
 12 DIY Decor Projects That Will Make Your Home Look Amazing!
 How To Arrange Tulips In A Vase In 5 Easy Steps!
 Mother’s Day Menu Ideas, Recipes & Table Decorating Tips
 8 Ways To Use A Pouf In Your Home
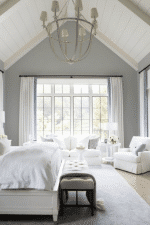 Home and Style Five – Amazing Lifestyle, Decor & DIY Tips!
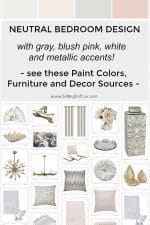 A Dreamy Neutral Bedroom Design – Gray, White and Blush Pink Color Palette
 Home and Style Five – Amazing Lifestyle, Decor & DIY Tips!
 Home and Style Five
 How to Make Cheap Grocery Store Flowers Look Expensive
 Blush Pink and Neutral Decor Spring Home Tour
 DIY Marble Bar Cart Top and Shelf
 Easy Spring Mantel Decorating Ideas
 Favorite Things – Fashion and Home
 Easy, Elegant Easter Table Decor Ideas & Entertaining Blog Tour
 Easy Faux Floral Wreath DIY Tutorial
 Stylish and Affordable Headboards
 Quick and Easy 10 Minute DIY Easter Decor Ideas
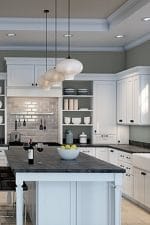 Sherwin Williams Acacia Haze Paint Color
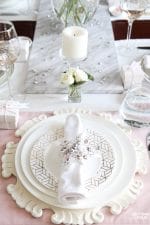 Blush Pink Valentines Day Table Decorations
 Home Trends for 2018 in Design and Decor
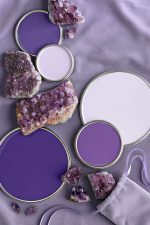 How To Decorate With Color Of The Year Pantone Ultra Violet!
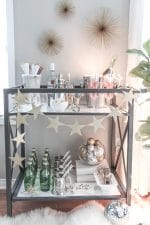 How To Create A Fabulous New Year’s Eve Bar Cart
 Christmas Family Room Decor Ideas
 20 Gorgeous Christmas Table Decor Ideas
 Quick and Easy Outdoor Christmas Planter – Holiday Decorating
 Flocked Christmas Tree – White and Gold Glam Style
 10 Minute Christmas Centerpiece Tray – Guest Worthy And Gorgeous!
 My Favorite Things
 The Perfect Christmas Tree For Your Space
 Elegant Fall Table Settings With A Blue And White Palette
 Favorite Things – Fashion and Home Decorations
 Sherwin Williams Oceanside: Color Of The Year 2018
 Fall Wildflower Tabletop Decorating Ideas
 15 Cozy and Neutral Fall Decorating Ideas
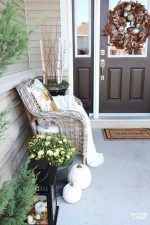 Cozy Rustic Fall Porch Decor
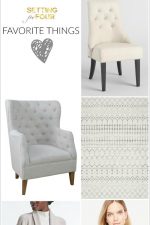 Favorite Things and Weekend Sales!
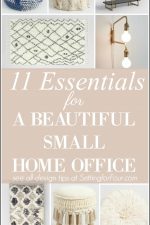 11 Essentials To Create A Beautiful Small Home Office
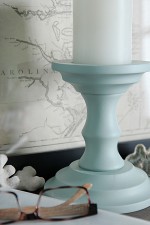 Painted Candlesticks – Beautiful DIY Home Decor
 Easy DIY Outdoor Curtain Rods In 10 Minutes
 Picture Perfect Bedrooms To Give You Weekend Inspiration
 8 Ways To Make The Most Of This Weekend
 Sensational Summer Outdoor Spaces
 A Pretty Faux Coral & Starfish Coastal Summer Centerpiece
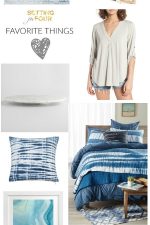 Favorite Things – Color Blue, Coastal Looks, Marble & Shibori
 Decorating with Indigo Blue, Black and Gray : Shades of Summer Home Tour
 How to Make Outdoor Waterproof Cushions – DIY Hack
 Favorite Things – Fashion and Decor
 How To Make An Easy Tulips Vase Arrangement
 Decorating with Lanterns – Outdoor and Indoor Ideas
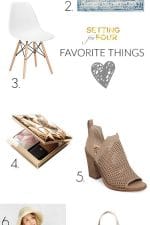 Favorite Things Friday and Sales!
 10 DIY Easter Decor and Gift Ideas
 12 Gorgeous Spring Home Tours – Day 4 and 5
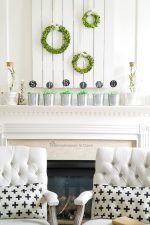 Beautiful Spring Home Tours – Day 3
 A Burst of Spring House Tour and Home Decor Ideas
 30 Spring Home Tours and Spring Decor Ideas
 Weekend Sales and Spring Inspiration!
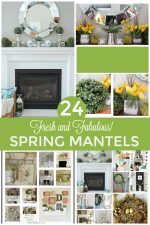 24 Fresh and Fabulous Spring Mantel Decor Ideas
 How To Grow A Cut Flower Garden
 Horse Art Decor – 20 Stunning Looks!
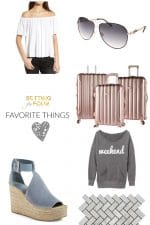 Favorite Things Friday- Home Decorations and Fashion
 10 Minute Winter DIY Decorating Birch Branches Idea
 Sherwin Williams Silverplate Paint Color : A Beautiful Neutral Gray
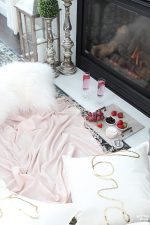 Date Night – Indoor Picnic Idea
 Painted Confetti Pattern Bowl – DIY Decor Hack
 How to Decorate With Pantone Color Of The Year Greenery!
 Magical Christmas Lights at Night
 How to Style a Bar Cart For The Holidays
 Neutral and Elegant Christmas Home Tour
 10 Minute Christmas Lantern Decor
 Elegant Table Setting Ideas For The Holidays
 White Christmas Tree – Rustic Glam Style
 DIY Ice Skate Wreath Decor – Quick and Easy!
 15 Minute Clear Ball Christmas Ornament
 Benjamin Moore Shadow: Color of the Year
 I’m featured in Better Homes and Gardens Magazine!
 DIY Tray Tutorial Using Tile and Cabinet Handles
 Favorite Things Friday! Beauty, Fashion and Decor
 An Indigo Blue Color Scheme For Our Living Room
 New Indigo Blue Rugs In Our Living Room and Kitchen
 7 Fabulous Fall Wreath Ideas for Your Home
 Favorite Things Friday – Fashion, Decor and DIY
 Easy DIY Centerpiece Using Vegetables, Fruit & Herbs
 Better Homes and Gardens Stylemaker Event
 Fall Front Porch Ideas
 7 Stunning Fall Centerpiece Ideas
 15 Creative Ways To Use and Style A Bar Cart!
 5 Decor Tips for Creating a Timeless Kids Bedroom
 Neutral Glam Fall Tour and Fall Decor Ideas
 Sherwin Williams Poised Taupe Undertones & Coordinating Colors
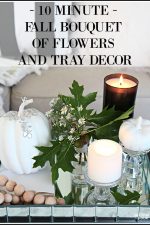 10 Minute Fall Bouquet and Tray Decor
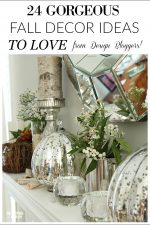 24 Gorgeous Fall Decor Ideas from Design Bloggers
 10 New Ikea Items We Need Now!
 10 Front Porch Decor Ideas To Add Beauty To Your Home
 Easy DIY Monogram Book Ends For Kids
 Indigo Blue: 10 Amazing Ways To Add It To Your Home
 5 Decorating Mistakes That Make Your Home Look Cluttered
 Height Measurements and How To Hang Pictures In A Bathroom
 8 Tips For Choosing Beautiful Ceiling Colors
 Make Gorgeous DIY Window Blinds!
 Palm Paradise Trend Alert
 Gallery Wall Of Botanical Prints
 Beach Style Decorating Ideas – Coastal Home Tour
 Top Paint Colors of the Year 2016
 12 Stylish Porch, Deck and Patio Decor Ideas
 Simple Summer Fire Pit Seating Area
 Make Faux Coral Inspired by Pottery Barn
 Outdoor DIY and Decor Inspiration
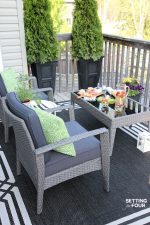 Summer Magic With A New Conversation Set
 Interior Design Advice: Do’s and Don’ts Every Beginner Should Know
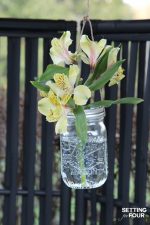 Outdoor Hanging Flower Mason Jars
 How to Tint Glass
 How to Make Your Small Outdoor Space Look Bigger
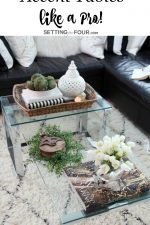 5 TIPS TO DECORATE ACCENT TABLES LIKE A PRO!
 Mothers Day Ideas! 6 DIY Gifts & Recipes
 Foyer: Spring Decorating Ideas
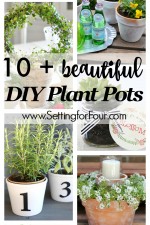 10 Beautiful DIY Plant Pots
 Beautiful, Natural Table Setting for Spring
 5 Fresh Market Picks for Spring & Easter Decor
 Globe DIY Makeover With Scrabble Letters
 Easter decorating ideas with Easter Eggs
 Insider Secrets: Breathtaking Table Setting Ideas from Eddie Ross
 5 Cheery Spring Decor Ideas For Your Home
 How to Create a Relaxing Bedroom Retreat : 11 Tips
 Kate Spade Home – See Her Surprising New Line!
 Winter Mantel Decorating Ideas
 Top 5 Home Design Trends to Crush On
 10 Minute Kitchen Decor Idea
 Free Watercolor WildFlower Art
 5 Fabulous Table Designs to Love!
 Decor, Gift and Home Furnishings Trends
 Laundry Room Organization in 3 Easy Steps
 5 Easy Organization Ideas to Create the Chicest Desk Ever
 Top Posts Of The Year
 Christmas Lights at Night Home Tour
 Win $10,000 La-Z-Boy Furniture- Ends Soon!
 Home Tour For Christmas Recap – Holiday Decor Ideas
 A Pencil Christmas Tree Style for Narrow Spaces
 Silver and Gold Holiday Style
 Holiday Cheer Outdoor Christmas Decorations
 Pantone Announces Two Colors of the Year 2016
 Christmas Home Tour – Part Two
 Christmas Home Tour with Country Living
 Outdoor Holiday Decor With Natural Elements
 Easy Tabletop Decorations You Can Do In Five Minutes
 Easy DIY Hostess Gift Mason Jar Of Flowers
 My Favorite Things Gift Guide for Her
 Easy Christmas Decorating with Thymes Holiday
 What to Decorate and Make in November
 Inspiring Living Room Design Ideas
 Color of the Year 2016 – Simply White
 How to Paint Walls Quickly with Less Mess!
 DIY Rhinestone Glam Bookends For Your Home
 Make it! DIY Potting Bench with Sink
 I’m off to the La-Z-Boy Design Dash Challenge!
 Home Office Furniture Ideas with Storage
 Home Office Makeover – Before and After
 Easy Pumpkin Decor with Printable Tags
 Easy Fall Table Centerpiece With Natural Elements
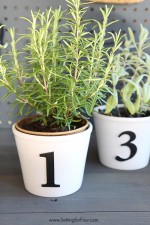 Easy DIY Herb Pots with Numbers
 10 Fresh Ways to Update your Decor
 5 Perfect DIY Pumpkin Decorations
 French Accents – How to Decorate Your Home in French Farmhouse Style
 Quick and Easy Fall Centerpiece
 DIY Pallet Bar – Instructions to Make!
 DIY Wood Pumpkin Stand
 Easy DIY Fall Basket Wreath with Book Page Garland
 Beautiful Fall Projects- Decor Ideas, Crafts and DIY’s
 Fall Mantel Decor using Fall Flowers and Foliage
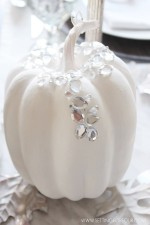 5 Pretty Fall Decor Ideas
 DIY Painted Glass Plates
 Fall Decor Inspiration
 Exciting News – La-Z-Boy Design Dash!
 Dining Room Update
 DIY Cable Storage Box Organizer
 7 Beautiful Early Fall Decorating Ideas
 Chalky Finish DIY Painted Candle Holders
 West Elm Hack – Striped Basket Makeover
 Butterfly and Fern Summer Wreath DIY
 DIY Pallet Potting Bench – Sneak Peek
 DIY Rope Decor
 Easy Way to Touch Up Wall Paint – My Paint Saint
 Free Watercolor Art Printable – Field of Flowers
 Easy, Affordable DIY Glass Cloche
 14 Takeaway Decor Ideas and Summer Home Tours
 Summer House Tour & summer decor ideas
 Summer Lodge Deck Decor Source List
 5 DIY Rope Projects You’ll Want to Make Now!
 Guest Bedroom Bedding – See the Update!
 Beachy Dining Room Decorating Ideas
 12 DIY Hula Hoop Projects that are Fun and Fabulous!
 Summer Deck Decor Ideas for Outdoor Living
 Dresser Makeover with Chalky Finish Paint
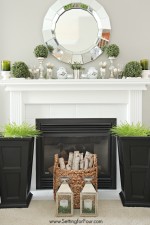 How to Grow Wheatgrass – Indoor Gardening and Decor Idea
 How to Make Graphics On PicMonkey – & FREE Instagram Graphic Picture
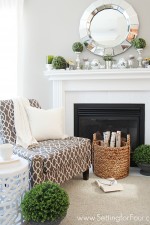 How to Create a Cozy Reading Nook – Key Decorating Tips!
 DIY Furniture Makeovers and Builds
 Decorating and DIY Project Preview
 Updating the windows- Faux Wood Blinds Installation
 Enter the Makers Mood Board Challenge Contest!
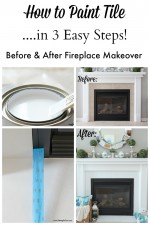 How to Paint Tile – Easy Fireplace Paint Makeover
 Spring Home Tour
 Spring Mantel Ideas – Decor and Projects
 13 Stylish Spring Mantel Decorating Ideas
 Creating Ambiance with Fragrance and Scents
 Spring Mantel Decorating Ideas
 DIY Tray from Cabinet Hardware and Marbled Tile
 The Easiest Way to Tint Mason Jars Blue
 Mantel Decorating Ideas for Winter
 DIY Decor – Painted Terracotta Tiles
 DIY Weathered Wood Stain Finishes
 Sweet Valentine’s Day Gifts and Decor Projects
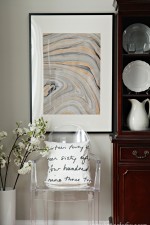 DIY Wall Art Idea using Marbled Paper
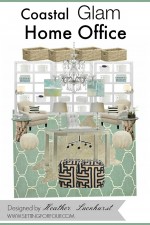 Coastal Glam Home Office | Mood Board Design
 Chalk Paint Table Makeover with Greek Key Stencil
 Top Ten Blog Posts of 2014
 Edible DIY Christmas Table Decorations – Santa’s Sleigh
 Rustic Glam Living Room + New Rug
 Winter Woodland Glam White Christmas Tree
 Christmas Home Tour
 Foyer Makeover & Decor Tips
 Christmas Entryway Decor Ideas – Winter Woodland Glam
 Winter Woodland Glam Christmas Centerpiece
 Happy Thanksgiving
 10 Plus DIY Christmas Tree Containers
 Woodland DIY Coasters Tutorial – DIY Gift Idea
 Glam Christmas Mantel
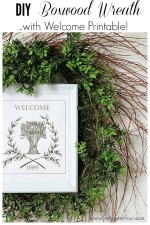 DIY Boxwood Wreath with Framed ‘Welcome’ Printable
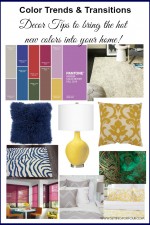 Fall Color Trends and Transitions | Decor Tips
 5 Quick and Easy Halloween Decor Ideas
 10 Sensational Fall Decorating Ideas
 Easy DIY Feather Place Card Ornament
 Fall Home Tour Part Two – Decorating Ideas & Vignettes
 7 Fall DIY Decor Projects & Delicious Halloween Recipes
 Bedroom Color Inspiration
 Fall Home Tour: Part One
 Three Ways to Use a Bookcase for Storage and Organization
 Fantastic DIY Makeovers and Favorite Recipes
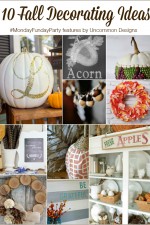 10 Fall Decorating Ideas and Inspiration
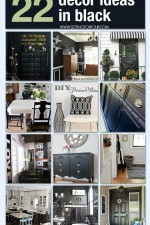 22 Decor Ideas in Black
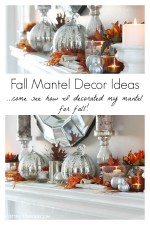 Fall Mantel Decor Ideas
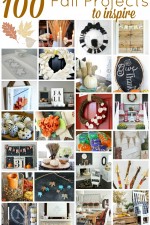 100 Fall DIY Project Ideas-Crafts, Decor & More!
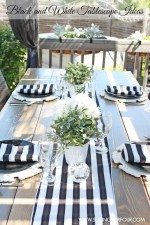 How to Make A Beautiful Black and White Tablescape
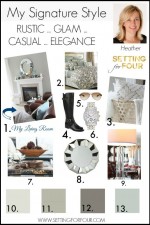 My Signature Style
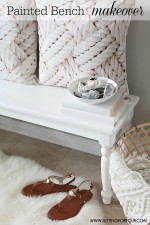 Painted Bench Makeover – DIY Home Decor Idea
 11 DIY Upcycle Ideas to Drool Over
 10 Fabulous Makeovers and DIY Projects
 DIY Restoration Hardware Inspired Farmhouse Table – with Bolted Plank Top
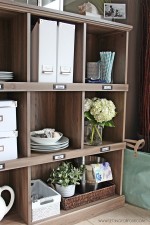 A Kitchen Storage and Display Bookcase
 DIY Fabric Lined Bookshelf Makeover
 10 Summer Decor Ideas – For the Home
 14 Fabulous DIY Home Ideas
 Mantel Decor Ideas : Blue, Taupe and White Palette
 My Outdoor Oasis-Outdoor Decor and Entertaining Ideas!
 Ikea Living Room Makeover
 A Quick & Easy Living Room Makeover: The Plan & Mood Board
 Hot Summer Color Inspiration | White and Gold
 Lake House Cottage Decor
 DIY Home Decor: Aqua and Gold Lacquer Paint Box Set
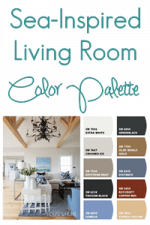 Blue, Grey and White Living Room Color Palette
 Paint a Tray with Grey Wash Finish
 Home Made Simple TV – Decor Ideas and Tips
 5 Beautiful Spring Table Decor Ideas
 10 Amazing DIY Outdoor Furniture and Decor Ideas
 Summer Fun with Dollar Tree
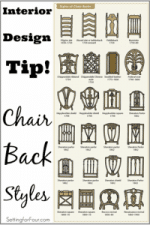 Design and Decor Tip: Chair Back Styles
 Setting the Table with Style – Tablescape Decor Tips!
 Spring Apothecary Jar Decor
 Find your Design Style and Get the Look!
 Everyday Life and Spring Ideas for the Home
 The Very First Decorating Decision You Need to Make for Any Space
 10 Plus Beautiful DIY Easter Eggs for Spring
 Update Your Window Treatments – Refresh Your Home with New Blinds
 Interior Decor E-Course / Be Your Own Decorator
 How to Decorate with Spring Flowers and Plants
 Spring Table Decor Ideas
 Molding and Trim Ideas
 Spring Bedroom Decor Inspiration With Dreamy Spring Colors
 DIY Pinecones on Wood Picks
 How to Make a Boxwood Wreath with Framed Chalkboard Printable
 Winter Entryway Decor and Curb Appeal Ideas
 Beautiful Winter Urn Decor Ideas
 100 Amazing Pinterest Party DIY and Decor Projects
 How to Make DIY Art West Elm Hack
 Cozy Living Room Vignette Decor
 DIY Sweater Pillow – DIY Home Decor Idea
 Top 5 Paint Colors – Beautiful Interior Color Inspiration!
 Easy Confetti Pattern Bowl DIY – Kate Spade Inspired
 Your Love is King – Fun Free Printable!
 The January Cure // How to Get Organized for a New Year
 New Year’s Eve Bash / Party Inspiration
 10 Fun New Years Eve Party Ideas
 Shell DIY Napkin Rings To Decorate The Table
 16 Amazing Christmas Decor, Crafts & Recipe Ideas
 Rustic Glam & Blue Christmas Tree
 3 Bathroom Decor Tips and Ways to Update Your Bathroom
 Radiant Orchid for your Home – Pantone Color of the Year 2014
 Christmas Home Tour – Home for the Holidays
 7 Christmas Holiday Decor Ideas
 Published in a Style Magazine!
 How to Display and Organize Kids Art
 7 Beautiful Christmas DIY Projects to Make
 25 Vignettes – Learn How To Decorate Vignette Displays!
 Trinsic Kitchen faucet with Touch2O Technology // Delta Faucet Review
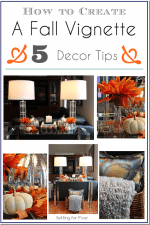 How to Create and Decorate a Fall Vignette
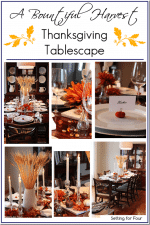 A Bountiful Harvest Thanksgiving Tablescape
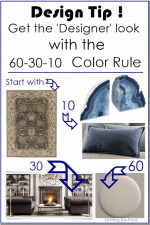 Design Tip: The 60-30-10 Color Rule
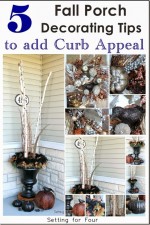 Five Fall Porch Decorating Tips to Add Curb Appeal
 20 Plus Napkin Folding Styles
 15 Fall Decor Ideas, DIY’s and Recipes
 Fall Home Tour and Fall Decor Ideas
 DIY Faux Zinc Garland Tutorial – Home Decor
 Celebrating Everyday Life Magazine Review
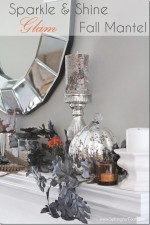 Sparkle and Shine Fall Mantel Decor
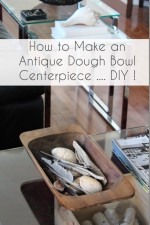 How to Stain and Refinish a Dough Bowl DIY Tutorial
 How to Pick the Perfect Chandelier Size Guide
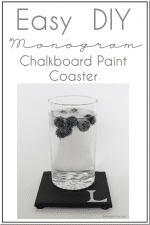 Easy DIY Monogram Chalkboard Paint Coasters
 The Meaning of Home
 The Best, Easy DIY Pillows for Autumn – Home Decor Ideas
 The Best Painting Tips from Paint Expert Andrew Downward
 18 Beautiful Bedrooms that Inspire // Home Decor Ideas
 10 + Coastal Cottage Home Decor Ideas
 15 + Summer Craft and DIY Ideas for the Home
 Exciting news! New career – I’m a Interior Design Consultant!!
 Interview with a Designer {Satori Design for Living}, Part One
 A Beach Inspired Mantel Summer Decor Ideas
 Designer Interview {Part 2} ~ Emily A. Clark
 Rustic Chic: 12 Reclaimed Wood Bedroom Decor Ideas
 12 Fabulous Vintage and Repurposed DIY Projects
 My Fireplace Mantel Reveal – A Makeover with Paint!
 Monogram Map Keepsake Box DIY Project
 See the CB2 and Novogratz Collection & Win a Trip to Brazil!
 Emily A. Clark // Interview with a Designer Part I
 4 Tips to Enhance Your Front Entry – Outdoor Seating and Decor
 Easy Online Shopping Ideas for Moms
 8 Beautiful Bedroom Ideas – Decor and Design Tips
 5 Fabulous Spring Decor and DIY Projects
 10 Beautiful Spring Mantel Decorating Ideas
 Designer Interview {Part Two} ~ Darlene Weir Fieldstone Hill Design
 St. Patrick’s Day Roundup: St Patricks DIY, Recipe & Decor Ideas
 How To Decorate a Mantle for Spring
 Modern Romance Living Room Decor Moodboard
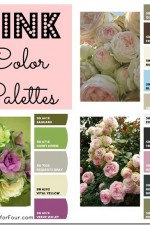 Color Palette – Pink
 How to Decorate a Mantle for Valentine’s Day #valentineHOA
 DIY Winter Wreath Tutorial with Printable
 Make A Snowflake DIY Craft- Winter & Holiday Decor
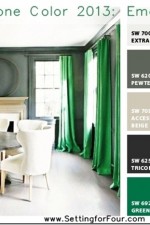 Pantone Color 2013 Emerald with Chip It
 DIY Sparkly Branch Centerpiece Tutorial
 Winter Décor Ideas – Five Tips
 DIY Holiday Glitter Pinecone Pompoms
 Tradition with a Red and White Christmas Tree
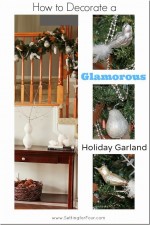 Holiday Garland For The Staircase
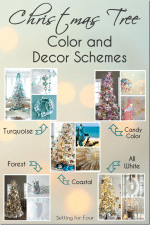 Christmas Tree Color and Decor Schemes
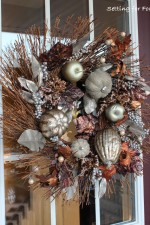 Metallic Fall Wreath – Curb Appeal
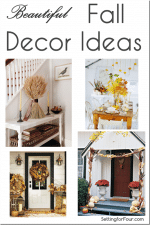 Decorating for Autumn: Inspiration from Home Magazines
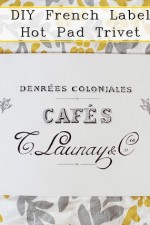 DIY Trivet Potholder For Your Kitchen
 American Flag Painted Tea Tin – Patriotic Home Decor
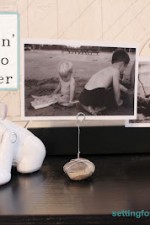 Make this Fun Craft: DIY Rockin’ Photo Holder
 Turn Children’s Art Into Tea Towels-Fun Gift Idea
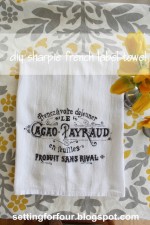 DIY Sharpie French Label Towel – Great Gift Idea!
 Easy and Inexpensive DIY Painted Vase
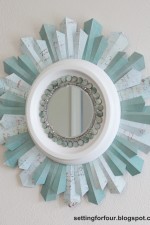 DIY Beaded Sunburst Mirror Tutorial
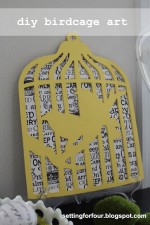 Easy DIY Birdcage Art Tutorial
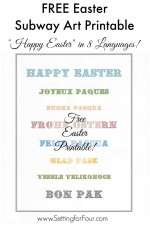 ‘ Happy Easter Across The World ‘ Subway Art
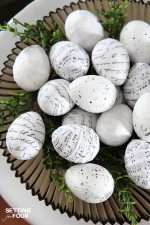 DIY French Script Easter Eggs Tutorial
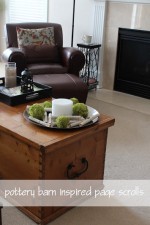 DIY Pottery Barn Inspired Page Scrolls
 5 amazing Pinterest projects and recipes!
 DIY Pillow Cover 5 Minutes to Make!
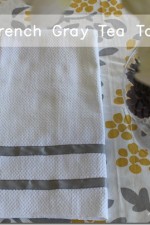 Quick and Easy Ribbon Trimmed Kitchen Towels
 Easy DIY Address Plaque Makeover
 Colour Trend: Blush Pink Home Decor
 My New Office Chair (The Reveal)!
 20 Beautiful Backpack Storage Ideas For A Clutter-Free Home
 Top 50 Exterior Home Paint Colors From Sherwin Williams
 2025 Holiday Decorating Trends: New Ideas for a Festive Home
 Fall 2025 Design Trends & Decor Ideas
 The Best Greige Paint Colors for a Timeless Home
 Simple Elegant Christmas Table Decoration Ideas
 Designer Picks: The Best Amazon Black Friday Home Decor Finds
 Benjamin Moore Cinnamon Slate – Color Review & Color Of The Year 2025
 Fourth Of July Backyard Party & Porch Decor Ideas
 How To Arrange Furniture In A Rectangular Living Room
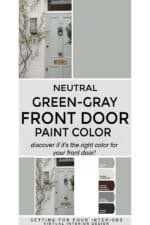 A Beautiful Green-Gray Front Door Color
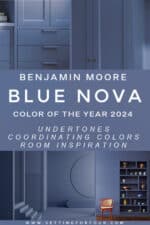 Benjamin Moore Blue Nova Color Of The Year 2024
 Behr Cracked Pepper Undertones & Coordinating Colors
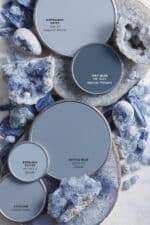 5 Sophisticated and Serene Blue Paint Colors
 21 Valentine’s Day Decor & Party Ideas
 How to Mix Design Styles So They Don’t Clash!
 The Perfect Christmas Tree Style For Your Room – All Sizes, Shapes & Colors!
 Summer Decor Ideas For Your Entryway And Family Room
 How to Makeover Your Stairs, Find a Good Pro – Tips to Replace Carpet and Install Hardwood
 Now You Can Have Black Interiors that are Bold not Bleak!
 Help Me Disguise a Wall Vent!
 Tried and True Color Trios Palette
 Decorate with Nature
Designing, decorating and updating your home can be frustrating and time consuming!
With these helpful design guides and decorating tips you’ll have the knowledge and confidence to tackle them on your own.
Whether it’s decorating a coffee table, arranging furniture or selecting paint colors I’ve got you covered!
These are step by step tips for beginners and for aspiring designers too!
There are design tips for every room in the home: the kitchen, living room, bedroom, bathroom, home office, dining room and exterior.
Having a home that is functional and beautiful is essential to feel joyful and comfortable.
Our homes are our sanctuaries from the stresses of everyday life.
Creating a beautiful home for yourself and your family that you all love is so rewarding.
Even if your home is small, you live in an apartment or condo or you have a small budget you can have a home that is gorgeous and brings you joy.
Whether you have small awkward spaces or large cavernous rooms there are design and decor tips for everyone!
Furniture arrangement and picking paint colors are 2 things that everyone finds frustrating.
You’ll find lots of helpful tips to arrange furniture in any size or shape of room.
As well as paint color undertones and coordinating colors that will help you pick the perfect color for your space.
Design solutions for tricky spaces such as small bedrooms and no entryways are included.
Tips to create a cohesive, cozy and stylish room that looks and feels pulled together.
Holiday decorating tips for the Christmas tree and mantel are included as well.
I also share mood boards with furniture and decor shopping links that you can copy for your home!